Sunday, 13 January 2019

3D Gingerbread Christmas Tree

O Christmas tree, O Christmas tree
How lovely are your branches......

Really  lovely because they are made from scrumptiously spicy gingerbread with a topping of orange-flavoured "snow" . Made using the Christmas Tree Cake Mould as below from Lake Land.


Ingredients:
  • 60g butter
  • 60g dark muscovado sugar
  • 50g golden syrup
  • 50g black treacle
  • 120g self-rising flour
  • 1 tsp ground ginger
  • 1 egg, beaten
  • 60ml milk
To decorate: 
  • 200g icing sugar, sifted
  • ½ tsp orange extract
  • Scrumptious Christmas 100s and 1000s
Method:

Preheat oven to 160°C/140°C for fan oven. Lightly grease the mould and set aside.

Place the butter, sugar, golden syrup and treacle into a saucepan and gently heat until the mixture has melted. Set aside for 10-15 minutes to cool slightly.

Sift flour and ground ginger into a large mixing bowl. Pour the cooled butter and sugar mixture into the flour, add the eggs and milk and mix together until well combined.

Pour the gingerbread cake mixture into all of the indents in the mould, filling each one three-quarter full.

Place in the oven and bake for 20-22 minuted or until firm and skewer inserted into the middles of the largest of the filled moulds comes out clean. Leave to cool completely, then remove the cakes from the mould.

Mix together the icing sugar and the orange extract, and add enough water to make the icing runny enough to pipe but stiff enough that it doesn't run ( about 6 tbsp). Add your icing into a disposable pipping bag fitted with a small round nozzle.

To assemble the cake, start off with the round cake piece as the base of the tree. Pipe a little icing onto the top to hold the next layer in place, then stack each of the star shaped cakes, largest to smallest, on top, adding icing between each layer to hold the cakes in place and to decorate with "snow".

Sprinkle over the 100s and 1000s, then dust with a little icing sugar for a finishing touch.


Mini Chocolate Cheesecake

These little beauty are as spectacular as they look. If you adore chocolate then this is the treat for you !. Layer upon layer of chocolate and they all marry together from the crust to the cheesecake and ganache to the whipped cream.


Ingredients

Crust:
  • 135g  oreo cookie crumbs
  • 28g butter, melted
Cheesecake:
  • 340g cream cheese, room temperature
  • 100g sugar
  • 2 tbsp unsweetened cocoa powder
  •  ¼ cup sour cream
  • ½ tsp vanilla extract
  • 2 eggs
  • 115g dark chocolate, melted
Chocolate ganache:
  • 85g semi sweet chocolate chips
  • ¼ cup double cream
Whipped cream:
  • ¾ cup double cream
  • 3 tbsp icing sugar
  • 3 tbsp cocoa powder
  • ½ tsp vanilla extract
  • mini chocolate bar for garnish
Method:

Preheat oven to 160°C/140°C for fan oven. Add cupcake liners to a cupcake pan. 

Combine the oreo crumbs and melted butter. Divide the mixture between the cupcakes liner and press into the bottoms.

Bake crusts for 5 minutes then remove from oven. Allow to cool while you make the filling.

Reduce oven to 150°C/130°C for fan assist.

In a large bowl, mix the cream cheese, sugar and cocoa until combined. Use low speed to keep less air from getting into the batter which can cause cracks. Scrape down the sides of the bowl.

Add the sour cream and vanilla extract. Beat on low speed until well combined.

Add eggs one at a time, beating slowly and scraping the sides of the bowl after each addition. Stir in the melted chocolate.

Add the filling to each cheesecake cup until cups are mostly full. Bake cheesecake for 15 minutes, then turn off the oven and leave the door closed for another 10 minutes. 

Crack the oven door and allow cheesecake to cool for 15-20 minutes, then out in the fridge to finish cooling. When the cheesecake are cool remove from the pan.

Add the chocolate chips for ganache to a small bowl. Heat the double cream just until it begins to boil. Pour the cream over the chocolate chips and then whisk until melted and smooth.

Add a little chocolate ganache to the top of each cheesecake.

To make the whipped cream, add the double cream, icing sugar, cocoa powder and vanilla to a large mixing bowl and whip on high speed until stiff peaks form.

Pipe whipped cream onto each mini chocolate cheesecake, then top with a mini chocolate bar. Refrigerate cheesecakes until ready to serve.


Saturday, 12 January 2019

Roasted Stuffed Seitan Roulade

I find myself at a loss as what to cook at Christmas, that omnivores and vegans alike will enjoy? This roast seitan roulade is the solution you have been looking for. It is simple to make, chock-full of goodness and is completely delicious too!

Packed with veggies, this vegan roast not only looks and tastes impressive, it's economical too. And as with any traditional roasts, it can be eaten as cold cuts and in sandwiches.

Making this roast stuffed seitan roulade is really easy. It looks far more complicated than it actually is.


Ingredients

For the seitan:
  • 4 large clove garlic
  • 350ml strong vegetable stock, cold
  • 2 tbsp olive oil
  • 1 tsp Marmite (optional)
  • 280g vital wheat gluten
  • 25g nutritional yeast flakes
  • 2 tsp sweet paprika
  • 2 tsp vegetable bouillon powder
  • 1tsp fresh rosemary needles
  • ½ tsp black pepper
For red cabbage and mushroon stuffing:
  • 2 tbsp olive oil
  • 150g leeks, washed, trimmed and roughly sliced
  • 3 large cloves garlic, smashed
  • 150g mushrooms, finely chopped
  • 100g red cabbage, chopped
  • 50g kale, chopped
  • 100g spinach, chopped
  • 15g breadcrumbs
  • 10g fresh parsley, chopped
  • 2 tsp vegetable bouillon powder
  • 1/4 tsp black pepper
Method

For the red cabbage and mushroom stuffing: Heat the oil in a pan over a medium heat flame, add the leeks and stir fry for 3-5 minutes until they have softened. 

Add the smashed garlic and continue to stir fry for another couple of minutes.  Turn down the heat to medium and add the red cabbage and kale. Mix well, and allow to cook until the vegetables started to soften.

Mix in the spinach and allow to wilt. Add the breadcrumbs, parsley, bouillon powder and black pepper and mix well.  Cook for another 5 minutes, then turn off the heat. Set aside to cool. You can make this few days in advance, store in an airtight container in the fridge for up to a week.

For the stuffed roulade: Pre heat oven to 180°C/160°C for fan assist oven. In a large mixing bowl, mix together the vital wheat gluten, paprika, rosemary and black pepper.

Using a blender, blitz the garlic, stock, oil and Marmite together and then add to the dry ingredients. Mix well until everything is incorporated and then knead for 5 minutes. 

On a large piece of baking paper, roll out the seitan into a vaguely rectangular shape until it is about 1.5 cm thickness. Layer the cabbage and mushroom stuffing.

Using the baking paper, starting at one of the short ends, carefully roll the seitan up into a log shape. Try not to stretch the seitan as you do this. Press the ends of the seitan together to seal.


Tightly wrap the log in aluminium foil. If your foil is thin, use two or three layers. Tightly twist the ends of the foil to stop it coming undone.
Place the seitan directly onto a shelf in the centre of the oven and cook for 2 hours, turning it over every 30 minutes to ensure even cooking and browning.

Once it is cooked, allow the roast seitan to rest in the wrapping for 20 minutes before slicing. Serve with traditional roast veggie and any other trimmings you fancy.


Apple & Cranberry chutney


Chutney are fantastic presents because they really improve with age and go brilliantly with Christmas cheeses and cold meats.

Ingredients:
  • 1kg cooking apples, peeled and chopped into small chunks
  • 500g eating apple, peeled and chopped into large chunks
  • 450g onion, sliced
  • 50g fresh root ginger, finely chopped
  • 1 tsp peppercorns
  • 500g granulated sugar
  • 250ml cider vinegar
  • 500g cranberry
Method:

Place all ingredients except cranberries in a large heavy-based saucepan, then gently heat, stirring until the sugar dissolves. Bring to the boil, then reduce heat and simmer, uncovered for about 50 minutes, stirring regularly until the apples and onions are tender, the mixture has thickened and no watery juice remains.

Add the cranberries, then cook for a further 10 minutes or so until just softened but not burst.

Spoon the hot chutney into sterilised jars and seal. Store unopened in a cool, dark place. The chutney will keep for up to 6 months. Chill on opening.


Thursday, 10 January 2019

Polar Bear Cupcakes

These cute polar bear cupcakes makes a perfect Christmas treats to share with friends and family. An easy & quick Christmas baking recipes to make. Made from sweet fondant icing and delicious desiccated coconut.


Ingredients:
  • 125g butter,softened
  • 125g caster sugar
  • 2 large eggs, lightly beaten
  • 1 tsp vanilla extract
  • 125g self-rising flour
For the topping:
  • 50g butter, softened
  • 125g icing sugar
  • 1 tbsp milk
  • 500g white fondant icing
  • 75g desiccated coconut
  • 50g black fondant icing
Method:

Preheat the oven to 180°C/160°C for fan oven. Line 12 hole  muffin tin with 12 muffin cases. Beat together the butter and sugar until pale and fluffy. Add the eggs a little at a time, beating well between each addition.

Fold in the vanilla extract and the flour then divide the mixture between the muffin cases. Bake for 15-18 minutes until well risen and golden. Take the cakes out of the tin and leave on a wire rack to cool completely before decorating.

To make the buttercream topping: whisk the butter with a hand-held mixer until pale. Add the icing sugar a spoonful at a time, whisking well between each addition. Add the milk and continue to whisk until the mixture is pale and creamy.

Roll out two thirds of the white fondant icing and cut out 12 circles using 7cm plain pastry cutter, this will form the polar bear's face. Pinch the edge of the icing circles in two places to create the polar bear's ears. Spread a little of the buttercream on the top of each cupcake and then put a circle of fondant icing onto each one.

Divide the remaining fondant into 12 and roll each piece into a small ball. Stick the balls onto the cakes using a dab of water and then brush the whole of the fondant icing lightly with water and dip into the desiccated coconut to coat completely.

Take the black fondant icing and roll out 12 balls for the noses and 24 small balls for the eyes. Use a little of the writing icing to stick these onto the bear's to create the faces.


Sunday, 16 December 2018

Mini Cheesecake with chocolate-stuffed raspberry center

These mini cheesecakes were good! Notice I used past-tense. And also they are stinkin' cute.


Ingredients:
  • 1 cup crushed Oreo biscuits
  • 30g butter, melted
  • 225g cream cheese, softened
  • 150g sugar
  • 2 eggs
  • 1 tsp vanilla extract
  • 12 raspberries, stuffed with chocolate chips, dark or white
  • melted chocolate for hearts and drizzle over cheesecakes
  • sprinkles of your choice
Method:

Preheat oven to 160ºC/140ºC for fan oven.  Add cupcake liners to a cupcake pan.

Combine the Oreo crumbs and melted butter. Divide the mixture between the cupcakes liners and press into the bottoms.

Bake the crust for 5 minutes then remove from the oven. Allow to cool while you make the filling.

In a mixing bowl, beat the cream cheese and sugar until well mixed. Add eggs and vanilla extract. Beat until light and fluffy

Fill  the cupcake liner ½ full and add one stuff raspberry into each of the cupcakes. Fill with the rest of the cheese cream batter. Bake for 12 minutes, then turn off the oven and leave the door closed for another 5 minutes. Crack the oven door and allow cheesecakes to cool for another 15-20 minutes, then pit in the fridge to finish cooling.

To finish off the cheesecakes, pipe the chocolate hearts onto parchment paper. Work quickly and add sprinkles before the chocolate hardens to ensure they stick well. Allow to harden.

Remove the cupcake liner from the cheesecake and place it in a serving plate. Drizzle with melted chocolate and place a chocolate heart on each cheesecake.


Sunday, 9 December 2018

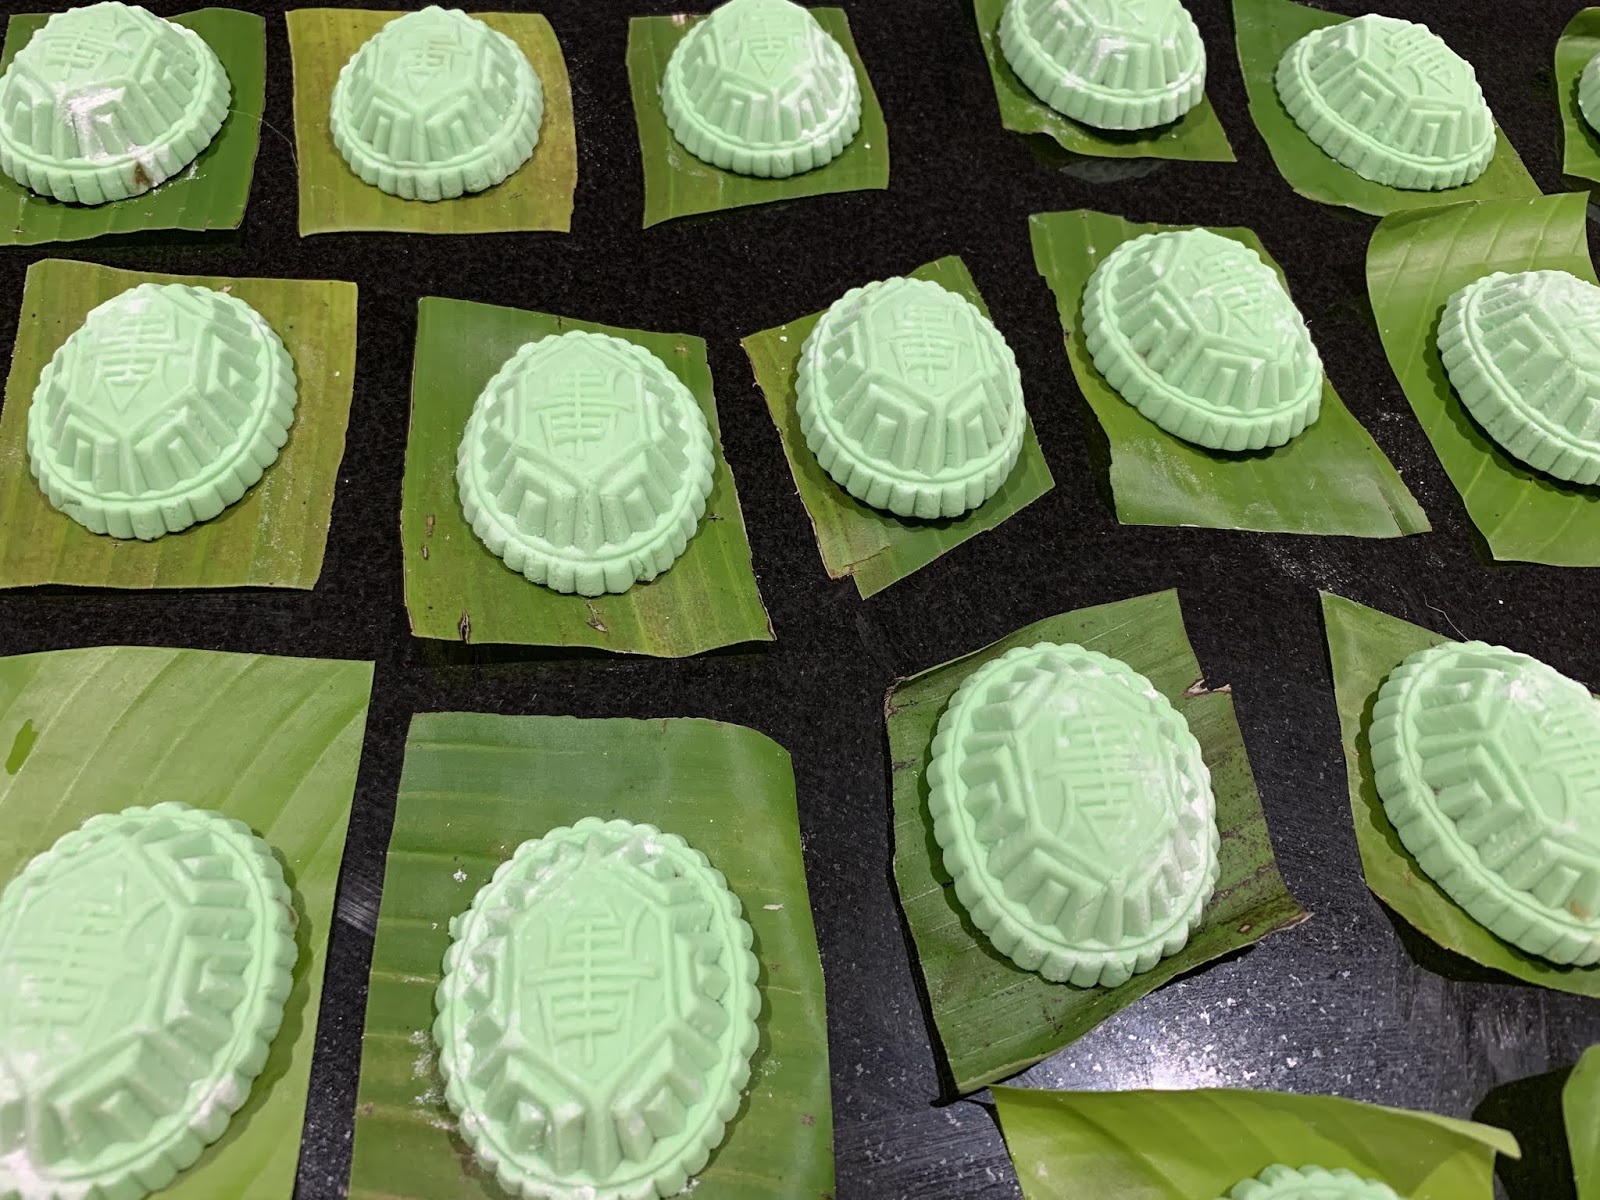
Pandan Angku (Gula Melaka Coconut Filling)

Traditionally this kuih is red colour and the filling is made of mung beans, known as Angku. However along the way lots of adaptation comes along and this green one is made from pandan juice with coconut filling. 
This kuih taste the best just when they have been freshly steamed. Because the skin will have the desired chewiness and the texture when is still lukewarm. Because such kuih entail a large portion of glutinous rice flour, they generally turn hard if left uncovered or overnight. To overcome this problem, do try and steam them up for a couple of minutes before consumption again.  Enjoy!!! 


Ingredients:
For the gula melaka filling:

  • 110g gula melaka, grated
  • 50g dark brown sugar
  • 80g hot water 
  • 2 pandan leaves, knoted
  • 150g fresh shredded coconut, I use desiccated coconut
  • 100g coconut milk if using desiccated coconut
  • 1 tsp cornflour +1 tbsp water
For the Pandan skin:

  • 80g yellow sweet potatoes, diced
  • 100g pandan juice, I used  ½ tsp pandan paste mixed with 100g water
  • 200g glutinous rice flour
  • 60g hot water 
  • 10g icing sugar
  • 2 tbsp cooking oil
Method:

Preparing gula melaka coconut filling: Combine coconut (or desiccated coconut , gula melaka, dark brown sugar, hot water, (coconut milk if using desiccated coconut) and pandan leaves in a non-stick cooking pan, cook over lowheat until sugar fully dissolved and the liquid has nearly dried up. Add in the cornflour mixture and cooked until the liquid dried up.

Divide the coconut filling into 20 portions and roll into a ball

Preparing pandan dough skin:  Steam the diced yellow potatoes over medium heat until very soft. Blend the pandan juice with the steamed sweet potatoes until smooth, set aside to cool.

Mix together hot water and 100g glutinous flour, then add in the pandan sweet potato paste, mix well. Combine icing sugar and another 100g glutinous flour , add to mixture. Mix into a dough. If too dry add a little pandan juice or water at a time until a smooth dough is formed. Add in cooking oil, knead until well blended.

Divide the dough into 20 portions, cover with cling wrap to prevent from drying.

Prepare 20 round banana leaves, coat with oil.

Lightly coat angku mould with glutinous flour, tap off excess flour. Shape the dough into a bowl, fill with coconut filling. Wrap filling fully with dough. Press until firm and shape into a ball. Put into the angku mould, press lightly with palm to fill the mould. Tap the mould gently on work top to un-mould the filled dough. Put onto an oiled banana leaf, then arrange in steamer rack.

Steam over medium heat for 8 minutes. Once taken out from steamer, lightly oiled the angku surface. Set aside to cool


Vegan Lemon Curd Layer Cake

Vegan lemon curd layer cake-easy, fluffy vegan lemon cake layered with vegan  lemon curd and vegan buttercream, perfect for any occasion!


Ingredients:
Vegan Lemon Curd:

  • finely grated zest of 1 lemon, optional
  • 1½ tbsp cornflour
  • juice of 2 large lemons, about 100ml
  • 50ml water
  • pinch of salt
  • 100g granulated sugar
  • 2 tbsp almond milk
  • 2 tbsp vegan spread
Vegan Lemon Cake:
  • 300ml almond milk, unsweetened
  • 1 tbsp lemon juice
  • 150g vegan spread
  • 3 tbsp golden syrup
  • 275g self raising flour
  • 45g cornflour
  • 1 tbsp bicarbonate soda
  • 175g castor sugar
  • finely grated zest of 3 lemons
  • couple drops lemon extract, optional
Vegan Lemon Buttercream:
  • 150g vegan spread
  • 225g icing sugar
  • couple drops lemon extract
Method:

Vegan Lemon Curd: Make the lemon curd at least the day before you assemble the cake. Place the lemon zest (if using) and cornflour into a small stainless steel pan. Gradually whisk in the lemon juice then whisk in the water, salt and sugar.

Stir over a medium heat until the sugar has dissolved then continue to cook, whisking constantly, until it comes up to a gentle simmer and becomes very thick; cook for a further minute.

Whisk in the almond milk and vegan spread and continue to stir over a low heat until melted and smooth then remove from the heat. If you like can pass the curd through a fine mesh sieve to remove the lemon zest. Transfer to a bowl or jar, cover and place in the fridge overnight. It will thicken as it cool and will keep in the fridge for about 3 weeks.

Vegan Lemon Cake: Preheat the oven to 180ºC/160ºC for fan assist oven. Grease 3x 6in round tins or 2 x8in round tins and line the bases with baking parchment.

Stir the lemon juice into the almond milk and set aside to curdle. Place the vegan spread and the golden syrup in a small pan and heat until the spread has melted, set aside to cool slightly.

Sift the flour, cornflour and bicarbonate soda into a large bowl and stir in the sugar and lemon zest. Whisk in the milk mixture then the melted spread and lemon extract until smooth.

Divide the batter evenly between the cake tins. Bake for about 25 minutes for the 6 inch pan and 30 minutes for the 8 inch pan, until golden, pulling away from the sides of the tin and a skewer inserted into the centre comes out clean.

Leave to cool in the tins for 20 minutes then carefully turn the cakes out onto a wire rack to cool completely.

Vegan Lemon Buttercream:  Place the vegan spread in a bowl and gradually stir in the icing sugar. Add the lemon extract then whisk until smooth.

To Assemble the cake: Very carefully trim the tops of two of the cake layers or one if you used the larger tins to make two layers rather than three. Place one of the trimmed layers on a serving plate and spread over half of the buttercream then spread over a generous layer of lemon curd.

Place the second trimmed layer on top and repeat the buttercream and curd. Top with the un-trimmed layer and serve.

Thursday, 29 November 2018

Toucan Chocolate cake

This project is testing my skill of cake decorating!!!! In actual fact I was impress with myself with my own art work. Can't believe I did it. This is a chocolate cake which is the birthday boy favourite


Vegan Chocolate Peanut Butter Mousse

Yes, only 4 ingredients! And takes about 5 minutes to make, made with natural ingredients with a natural sweetener (maple syrup), and no bake, dairy-free and gluten free! It  even delivers on taste: smooth, delicious and features the age-old stellar combination of chocolate + peanut butter. The only surprise ? TOFU


Ingredients:
  • 400g silken or soft tofu
  • 1/3 cup natural peanut butter
  • 6 tbsp maple syrup
  • ¼ cup cocoa powder
  • 2 tbsp salted peanuts, for garnish
Method:

In a food processor or blender, puree the tofu with 1/3 cup peanut butter, 6 tablespoons maple syrup and ¼ cup cocoa powder in a blender until smooth.

Divide the pudding among glasses and refrigerate for 20 to 30 minutes, until set.

For the garnish, crush 2 tablespoons peanuts and sprinkle on top of the pudding. Dust with a touch of cocoa powder, if desired.


Sunday, 18 November 2018

Lemon Blueberry Mini Bundt Cake


This recipe is so moist and full with flavour. No dry cake mouth will be found after eating one of these babies !!! It is almost impossible not to smile while you're eating on of these!
It's so fresh and zesty

Ingredients:
  • 145g butter, softened
  • 2 cup sugar
  • 4 eggs, room temperature
  • 1 tsp vanilla extract
  • 2¼ cups plain flour
  • 2¼ tsp baking powder
  • ½ tsp salt
  • 1¼ cup full fat milk
  • ½ cup plain, vanilla or greek yogurt
  • 2 tbsp lemon juice
  • 2 tbsp lemon zest
  • ¾ cup blueberries, fresh or frozen
Glaze:
  • 1 cups icing sugar
  • 2-3 tbsp lemon juice
Method:

Preheat oven to 180°C/160°C for fan oven.

In a standing mixer combine butter and sugar. Let it mix until light and fluffy.

Add in the eggs and vanilla.  Mix until completely combined.

In a separate bowl, whisk together flour, baking powder and salt.

In another small bowl, combine milk, yogurt, lemon juice and lemon zest.

Add 1/3  of milk mixture to the standing mixer, let completely combine. Add ½ of the dry ingredients to the standing mixer and combine well.

Add half of the remaining milk mixture and mix well. Add the remaining dry ingredients. Mix completely. Add in the remaining milk mixture and mix well.

Toss frozen berries with flour. Add dusted berries into the batter. Fold berries into the batter making sure not to over mix.

Bake the mini bundt cake for about 18-20 minutes. For full size bundt cake, bake for about 45-50 minutes. Insert a toothpick into the cake. If the toothpicks comes out clean, the cake is done.

To make the glaze: Combine the icing sugar and lemon juice. Start with adding 2 tbsp of lemon juice and slowly add more to get a runny consistency. Drizzle over the cake when the cakes is cool down.


Thursday, 18 October 2018

Rhubarb Sorbet


I am not sure what first drew me to rhubarb. Perhaps, it was the name. Rhubarb!. It sounds so strange, intriguing, even whimsical. But it isn't just the name. That clolour! From the palest pink  to dramatic ruby-red.

And then there's the flavour of rhubarb-so sour when raw, magically transformed into something floral and fruity when cooked. This sorbet perfectly captures all that love about rhubarb. 

Ingredients:
  • 600gm sliced rhubarb
  • 275g sugar
  • 1¼ cups water
  • 1 tsp vanilla extract
  • pinch of salt
  • 1-3 tbsp fresh lemon juice
Method:

Trim  green ends off rhubarb and wash the stalks well.  Cut the rhubarb into small pieces, and place in a large pot. Add the sugar, water, salt and vanilla extract. 
Bring the mixture to a boil, reduce heat and simmer uncovered for about 10 minutes, until rhubarb is very soft. Remove from heat and let the mixture cool for about 10 minutes.  Add 1 tbsp of lemon juice.

Puree the rhubarb mixture in batches in a blender until smooth and very finely pureed. Taste the sorbet mixture. If it is a bit too sweet, add the remaining lemon juice, one tablespoon at a time, until the desired balance of sweet and tangy is reached. Transfer mixture to a clean, seal-able container and store in the fridge overnight, or until well-chilled, at least 4 hours. Transfer sorbet mixture to an ice cream maker and freeze according to the manufacture's directions. 

Rhubarb sorbet stores well in the freezer for up to 3 months


Sunday, 7 October 2018

No Bake Blueberry Cheesecake


Rich, velvety cheesecake combined with plump, ultra sweet blueberries makes for one of the most delectable desserts you will ever eat. The best part?  This beauty is no bake!


Ingredients:
  • 85g crushed biscuits
  • 15g butter, melted
  • 1 cup frozen bluberries
  • 3 tbsp sugar
  • 2 tsp lemon juice
  • 2/3 tsp powdered gelatin
  • 225g cream cheese, softened at room temperature
  • 1/2 cup plain yogurt
  • 1/2 cup double cream, divided
  • 3 tbsp sugar
  • 2 tbsp lemon juice
  • 1 tbsp powdered gelatin
  • 10 to 15 fresh blueberries, optional
  • edible flowers, optional
Method:

Place biscuits in a food processor and combine with  butter. Press the mixture into a pan lined with aluminium foil. Combine frozen blueberries, 3 tbsp sugar and 2 tsp lemon juice in a bowl. Microwave for 2 minutes. Add 2/3 tsp powdered gelatin and mix well. Set aside.

In a bowl, combine the softened cream cheese, yogurt, half the amount of double cream, 3 tbsp sugar and 2 tbsp lemon juice. Mix well until smooth.

Heat the rest of the cream in the microwave until just before boiling. Add 1 tbsp powdered gelatin to combine. Add this to the cream cheese mixture and mix until smooth.

Divide the mixture evenly into three separate bowls. Add all the berries and half the blueberry mixture liquid into one bowl. Pour in the rst of the liquid into the second bowl. Leave the last bowl as it is.

Pour in the blueberry cheesecake mixtures into the crust starting with the darkest one, finishing with the plain cheesecake mixture. Refrigerate for 2 to 3 hours over overnight. Before serving decorate with blueberries and edible flowers id desired. 


Chocolate Tofu Cheesecake

Hosting a dinner party for vegan friends? End on a high with this tasty chocolate cheesecake.


Ingredients:
  • 500g silken tofu (soft)
  • 5-6 tbsp raspberry jam
  • 350g dark chocolate
  • 3 tbsp brandy, use orange juice as replacement
  • 250g digestive biscuits, crush into fine crumbs
  • cocoa powder to dust
Method:

Place the biscuits into the food processor and blitz to a fine crumbs. Place the crushed biscuits into a separate bowl and add two tablespoons of jam and mix to a dense dough (add some jam if needed). Press the mix firmly and evenly onto the bottom of a cake mould so you create a flat and even cake base.

Pour a little water into a pot and bring to boil. Place chocolate into a bowl and set on top of the pot with boiling water (do not let the bowl touch the water). Melt the chocolate while occasionally stirring.

Meanwhile, place tofu, jam and brandy into the food processor and mix to a very fine puree.

Remove the melted chocolate off the heat and add to the tofu and whisk together well.

Pour the chocolate cream onto the cake base and chill for two to three hours.

Remove the cake from the fridge. Place some cocoa powder into a mesh sieve and dust the surface of the cake. To remove the cake from the mould and serve.


Saturday, 29 September 2018

Cupcake Bouquet

A cupcake bocquet is a sweet, stunning and jaw-dropping alternative to a traditional floral arrangement-doing double duty as centerpiece and dessert. This cupcakes bouquet makes a wonderful gift for family and friends. It is sure to put a big smile on anyone's face. This is a simple yet creative way to display your cupcakes and perfect for special occasions like Mother's Day or for that special someone's birthday as food gift. 

Make the base in advance and customise the floral colours to match the theme of your Mother's Day brunch, a baby shower, bridal shower or even a birthday bash!


Sunday, 2 September 2018

No Churn Blackberry Ice Cream


With just 7 simple ingredients, this recipe for fresh blackberry ice cream is one of the easiest summer recipes around. A simple no-churn vanilla ice ice cream base is swirled with homemade fresh blackberry jam for a frozen treat that tastes amazing. Making ice cream without an ice cream maker is easier than you think.


Ingredients:
  • 4 cups of fresh blackberries
  • ½ tsp lemon juice
  • ½ cup sugar
  • 2 cups double cream
  • 1 can sweetened condensed milk
  • 2 tsp vanilla extract
  • 1 tsp corn flour with 2 tbsp water, mix well
Method:

Add the blackberries to a blender and pulse until fully pureed. You want a smooth, juicy consistency. Press the puree through a fine mesh sieve and discard the pulp. You should have about 2 cups of the liquid. Transfer the liquid to a medium saucepan, add in the lemon juice and sugar. Heat over medium-high heat until reduced and thickened, about 10 minutes, stir occasionally. Add in the corn flour water and mix well. Transfer to a bowl and refrigerate until cold.

Add double cream to a large bowl. Using an electric mixer, beat until stiff peaks. Turn the speed low and slowly pour in the condensed milk. Add the vanilla extract. Turn the speed back up to high and beat until thickened.

Transfer 2 cups of the whipped cream to a separate bowl. Add in the cooled puree and mix util well combined. Gently fold into the remaining whipped cream to create a swirls. Don't over mix or you will lose the swirls. Transfer to a freezer-safe container and freeze for at least 6 hours.

Enjoy!!


Pulut Tai Tai


Commonly served as dessert or delicacy during the Straits Chinese weddings, this kuih is made of glutinous rice steamed in coconut milk, compacted into a wooden frame and then, cut into desire shapes. The vibrant blue in certain parts of the kuih enhances the beauty of this kuih. It always served with kaya, a rich coconut milk & egg jam.
One of the important steps in making the Pulut Tai Tai is to apply weigh onto the steamed cooked glutinous rice to make it firm. The firmer the kuih, the better the texture.


Ingredients:
  • 400g glutinous rice
  • 15 blue pea flowers (bunga telang)
  • 1½ tbsp white vinegar or lemon juice
  • 200ml coconut milk
  • ¾ tsp salt
  • 3-5 pandan leaves (screw-pine leaves)
Method:

Wash and soaked the flowers in hot water for 30 minutes to an hour. Squeeze the flowers to extract most of the colour from the flowers. Strain the indigo blue colouring. set aside.

Wash the glutinous rice  Soak 1/3 of the glutinous rice with the blue colouring extract and balance of the rice with water. Add ½ tbsp of vinegar to the blue colouring rice and stir well. Then add 1 tbsp of vinegar to the balance of the rice and stir well. Soak for at least 4 hours or overnight.

The next day or 4 hours later, the rice should be stained with blue colour. Drain both the glutinous rice.

Prepare the steamer. Line the steaming tray with banana leave and lightly grease with oil. Place pandan leave in the tray.

Place both the glutinous rice into the lined steaming tray. Mix coconut milk with salt. Pour ½ the coconut mixture over the rice and mix well. steam over high hat for 20 minutes.

Remove from steamer and fluff the rice with a pair of chopstick and discard the pandan leaves.

Then add the balance of the coconut milk mixture. Return to steamer and steam for another 10-15 minutes.

Line a 7x7 inch square pan or wooden box with banana leave and lightly grease with oil. Transfer the cooked rice to the pan alternating the blue portion with white. Mix well. Level the surface and press down the rice with a  banana leaf. Cover the top of the rice with a banana leaf and place a heavy object on it to compress the rice. 

Leave to cool before cutting into pieces to serve with Kaya.


Monday, 20 August 2018

Mini Mint Chocolate Oreo Cheesecakes

These Mini Chocolate Oreo Cheesecakes are easy to make and delicious with just the right amount of mint flavour! The lovely things about these cheesecakes is that they are easy to out together and even easier to share in their cute mini state. Plus, they are so mini, you can totally have like two or three!


Ingredients:

Crust
  • 200g Oreo crumbs
  • 40g butter, melted
Cheesecake filling
  • 340g cream cheese, room temperature 
  • 100g sugar
  • 25g flour
  • 115g sour cream
  • 2 tsp mint extract
  • 1 tsp vanilla extract
  • 2 eggs
  • 140g chopped Mint Oreos
  • green gel colour
Chocolate Whipped Cream
  • 180ml double cream
  • 25g icing sugar
  • 15g cocoa powder
  • 1/2 tsp vanilla extract
Method:
 o
Crust: Preheat oven to 160ºC/140ºC for fan oven. Add cupcakes liners to a cupcake pan.

Combine the oreo crumbs and melted butter. Divide the mixture between the cupcake liners (about 1½ to 2 tablesppons per cup) and press into the bottoms.

Bake crusts for 8 minutes then remove from oven. Allow to cool while you make the filling.

Cheesecake filling and topping: In a large bowl, mix the cream cheese, sugar and flour until combined (use low speed to keep less air from getting into the batter, which can cause cracks). Scrape down the sides of the bowl. 

Add the sour cream.mint extract and vanilla extract. Beat on low speed until well combined. Add eggs one at a time, beating slowly and scraping the sides of the bowl after each addition. Gently fold in the chopped Mint Oreos. Add some green gel colour to get a nice shade of green if desired.

Divide the batter between the cupcake liners and fill most of the way.

Bake the cheesecake for 13 minutes, then turn off oven and leave the door closed for another 15-20 minutes. Crack the oven door and allow cheesecakes to cool for 5 minutes, then put in the fridge to finish cooling.

Once the cheesecakes are cooled and firm, make the whipped cream. Add the double cream, icing sugar, cocoa powder and vanilla extract to a mixer bowl fitted with the whisk attachment and whip on high speed until stiff peaks form.

Pipe swirls on top of each cheesecake, then top with half of a mint Oreo. Refrigerate until ready to serve.


Sunday, 5 August 2018

Rhubarb And Vanilla Cheesecake


This cheesecake is one of the prettiest cake I ever made. Not just looking pretty it's also tastes delicious. 


Ingredients:
  • 220g Hobnob biscuits
  • 75g melted butter
  • 200g rhubard
  • 2 x 50g caster sugar
  • 225g cream cheese
  • 250g mascarpone cheese
  • 2 tsp vanilla extract
  • 1 packet or 4 leaves of gelatin
  • 1 cup boiling water
To decorate:
  • 1 cup water
  • 50g castor sugar
  • 250g/6 long rhubarb sticks 

Method:

For the cake: Blitz the Hobnob and melted butter in a food processor until they resemble wet sand. Press down the mix with a spatula in 6 inch spring release. Cake tin lined with greaseproof paper. Refrigerate.

Peel 200g of the rhubarb and place in a saucepan with 50g castor sugar over a low heat until it has become a piree. Allow to cool.

In a mixer, whip the cream cheese, mascarpone and vanilla. 

Take a cup of boiling water and add the sugar and gelatin to it. Let it stand for 5 minutes stirring now and then.

Add the rhubarb puree to the cream cheese mix and then pour in the dissolved sugar gelatin mix. Whip till well combined and then pour onto the crust. Cover and refrigerate for at least 2 hours.

For the rhubarb topping: Using a peeler,slice long strips of washed rhubarb (including the skin to add colour). In a small saucepan add water and the remaining 50g sugar and bring to boil, then reduce to a simmer.

Lay out paper towel the length of the rhubarb strips. Add the strips of rhubarb a few at a time and cook for 20-30 seconds in the liquid.

Remove them from the liquid and lay them flat on the paper towel to cool. 

Once you have enough to cover your cake, take your cake out the tin and peel the lining paper off.

To decorate: Take the ribbons of cooked and cooled rhubarb and lie then over the surface of the cake ( You can do this randomly or in an ombre or strips, whatever you like best).

Then using scissors, cut the edges so you have a round edge that comes to the very edge of the top of the cake. Take the remaining rhubard and wrap them around the sides. Over lap them until the whole cake is covered.

Using a brush with the rhubarb cooking liquid, brush the whole cake, this will help it to stick and gives you a smooth glossy surface.