Sunday, 26 February 2017

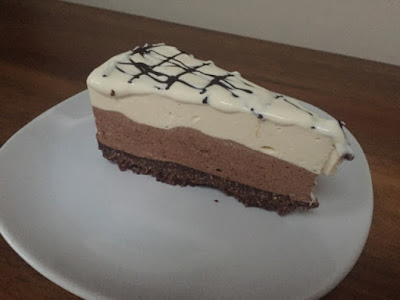
Blueberry Double Cheesecake


I used the cotton cheesecake recipes and turned it into a lemon one, then I did a light no bake cheese cake on the outer layer, of which acted like frosting, a luxurious one 😄
Ingredients:

Lemon Cotton Cheesecake:
  • 225g cream cheese, room temperature
  • 1/2 cup milk
  • 5 large eggs
  • 1/4 tsp cream of tartar
  • 1/4 cup sugar + 1/4 cup sugar
  • 63g unsalted butter, room temperature 
  • 1 tbsp lemon juice
  • 1/4 cup plain flour
  • 2 tbsp cornstarch
  • 1 tsp lemon zest
Blueberry Mascarpone Layer
  • 125g blueberries
  • 70g butter
  • 1tsp lemon juice
  • 200g mascarpone 
  • 100g double cream
  • 1/2 tbsp agar agar powder or gelatin + 2 tbsp water.
Method:

For the cotton cheesecake:

Line the bottom and sides of an 8 inch springform pan with parchment paper. Wrap the springform pan with several sheets of foil, sealing it completely.

Fill a large baking pan halfway with water. Place it in the oven on the oven lowest rack. Preheat the oven to 150°C.

Separate the eggs and place the egg whites into a large mixing bowl and the yolks into a measuring cup.

Beat egg whites on low speed for 30 seconds. Increase the speed to medium low and beat for another 30 seconds or until foamy. Add the cream of tartar. Increase the speed to medium high and beat until the egg whites just started to thicken. Add 1/4 cup of sugar gradually. Continue to whisk unti, the egg whites reach soft peaks stage, approximately 3 minutes using stand mixer. 

In a separate bowl add cream cheese and milk. Mix on low speed until creamy and smooth (approximately 2-3 minutes). Add the butter, sugar, lemon juice and lemon zest and beat for 1 minute. Add the flour and cornstarch and mix for another minute. Finally add the egg yolks and mix for 1 more minute. Strain the batter using a sieve.

Add 1/3 of the egg whites and gently fold into the batter until mostly incorporated. Add another 1/3 and gently fold. Add the remaining 1/3 and gently fold. 

Pour the batter into the lined springform pan. Spread the batter evenly into the pan and smooth out the top using a spatula. Holding the sides of the pan, gently lift and drop the pan on the counter about 6 times to remove any big air bubbles. 

Place the springform pan into the water bath and bake the cake for 1 hour and 10 minutes. Check the cake doneness by inserting a toothpick into the centre of the cake. It should come out clean. Bake the cake for additional 10-15 minutes to brown up the top.

Turn off oven, open the oven door slightly (about 2-3 inches) and let the cake cool in the oven for 1 hour.

Remove the cake from the pan. Place on a plate and refrigerat the cake for at least 4 hours. Wash the outer cake pan clean, and wipe dry. Lightly grease the sides with butter. When it's time to do the final assembly, place the chilled cheesecake back in. 

For the mascarpone layer

Cook blueberries with sugar until bleed. Add in lemon juice. Puree it. 

Prepare agar agar powder/gelatin. Sprinkle gelatin over water and let it sit for 2 minutes. Melt it in microwave oven for 15 seconds. For agar agar place it on a lower heat & keep stirring unti, the agar agar powder dissolved and turn clear. Let it cool down.

Beat the double cream until soft peaks, keep in the fridge. Then beat mascarpone cheese with blueberry puree until smooth.mtaste it, it should be slightly oversweetened ( it will be alright once you add in the cream). Adjust taste with sugar and lemon juice if necessary. 

Beat in melted agar agar/gelatin until smooth, then add in whipped cream, mix on low speed. 

Pour the blueberry cheesecake over and level the surface. Chill for at least 3 hours before slicing 


Non-bake Reese's Peanut Butter Cheesecake


This non-bake cheesecake is smooth, creamy and full of peanut butter!!!!  Peanut butter lovers- this one's for you!

Ingredients:

Crust:
  • 2 1/2 cups Oreo crumbs
  • 75g butter, melted
Filling:
  • 680g cream cheese, room temperature
  • 1/2 cup sugar
  • 1 tsp vanilla extract
  • 315g peanut butter 
  • 30 mini Reese's chopped, divided
  • 1 cup double cream
  • 1/2 cup icing sugar
  • Chocolate sauce for drizzle 
Method:

Combine Oreo crumbs with melted butter. Press crumbs into the bottom and halfway up the sides of a 9 inch springform pan. Set in refrigerator to firm. 

Mix cream cheese, sugar, vanilla and peanut butter together in a large bowl until smooth and well combined. 

Pour double cream & icing sugar in another bowl & whipped until soft peak. Gently stir in the whip cream.

Add about half of the chopped Reese's and stir until combined. Pour filling into crust and smooth the top. 

Refrigerared for about 4-6 hours or until firm. Remove cheesecake from springform pan and top with the remaining chopped Reese's and chocolate sauce. 

Refrigerate until ready to serve. 


Sunday, 5 February 2017

Braised Tofu


I love tofu dishes.

Ingredients :
  • 1 large block firm tofu cut into about 8 pieces
  • 6 tbsp oil
  • 2 garlic, minced
  • 1-2 dry chillies, add more if you prefer spicier 
  • 2 tbsp oyster sauce
  • 1 tbsp light soya sauce
  • 1 tbsp dark soya sauce
  • 1 tbsp Shaoxing wine or sherry
  • 2 tbsp sugar
  • 1/4 tsp ground white pepper
  • 1 cup water
  • 3 spring onions, cut into 1 inch pieces
Method:

Heat oil in a frying pan and fry the tofu pieces until golden brown. Set aside.

Sauté garlic and chillies until fragrant, about 2 minutes. Then add oyster sauce, light soya sauce, dark soya sauce, Shaoxing, sugar, ground white pepper and water. Mix well and bring to boil. 

Return tofu to the pan, reduce heat and simmer until the sauce is reduced by half, about 10 to 15 minutes.

Add the spring onions, mix well and cook for another minute. Turn off heat, transfer to a serving plate and serve with steamed white rice. 

Wednesday, 1 February 2017

Nutella Cheesecake Brownies


Two amazing desserts in one ?? First there is a dense, chewy brownie. And topped off with a delicious non-bake Nutella cheesecake layer. Together, the equal a slice of chocolate heaven !

Ingredients:
For the brownies
  • 3/4 cup flour, sifted
  • 1/2 cup cocoa
  • 1/2 tsp salt
  • 11/2 cups sugar
  • 170g butter
  • 1 tsp vanilla extract 
  • 2 eggs
For the Nutella cheesecake:
  • 1 cup Nutella
  • 227g soft cream cheese
  • 1 cup icing sugar
  • 11/2 cups double cream 
  • Melted chocolate, for decoration 
Method:

Preheat oven to 180°C/160°C for fan oven. Grease a 9 inch square baking pan. 

In a large bowl, combine flour, cocoa and salt. Melt butter in a large saucepan and remove from heat. Stir in sugar and vanilla extract. Quickly whisk in eggs, one at a time.

Add butter mixture to flour mixture and stir until well blended. Spread brownie batter into prepared tin and bake for 20-30 minutes. Cool completely. 

Meanwhile, make the Nutella cheesecake layer. With an electric mixer, beat together cream cheese, Nutella and icing sugar until smooth. 

In a separate bowl, beat double cream with an electric mixer until stiff peaks form. Fold the whipped cream into the Nutella mixture. Spread over the cooled brownies. 

Refrigerate for at least 2 hours before serving or until the cheesecake layer is firm. Drizzle with melted chocolate if desired.


Sunday, 8 January 2017

Non-Bake Dark Chocolate Mascarpone Cheesecake


This thick, creamy dark chocolate and mascarpone cheesecake tastes just like a baked cheesecake!

Ingredients :

For the cookie base

  • 320g chocolate chips cookies, finely crushed 
  • 2 tbsp icing sugar
  • 130g unsalted butter, melted
For the filling
  • 130g dark chocolate, 70% cocoa solid, finely chopped
  • 225g cream cheese
  • 450g mascarpone cheese
  • 90g icing sugar
  • 2 tbsp double cream
  • 1 tsp vanilla extract
  • 1 tbsp cocoa powder to decorate
Method:

Line a bottom of a 9" springform pan with baking paper. 

To make the base: In a large bowl stir together the crushed cookies and the icing sugar. Add the melted butter and stir until the crumbs are evenly moistened. Scoop the crumbs into the cake tin and press it firmly into the base using the back of a spoon.

For the filling: In a bowl, melt the chopped chocolate in the microwave in a 30 second intervals, stirring after each heating, until melted. Be careful not to overheat the chocolate. (It's best to remove it from the microwave whilst there are still a few small lumps left and stir until melted. 

Allow it to cool for 5 minutes, then add in the cream cheese and mascarpone and beat with electric whisk on low speed until smooth and well combined. Add in the icing sugar, cream and vanilla extract and beat again until smooth. 

Carefully pour the filling onto the base and smooth the top using a spatula or back of a spoon. 

Place in the fridge to chill for 4-5 hours preferably overnight.

To serve, remove from the fridge and allow the cheesecake to come to room temperature for 15-20 minutes. Dust lightly with the cocoa powder and serve. 


Coconut Snowballs


Sweet coconut treats, perfect to share or give as a gift

Ingredients:

  • 125g rich tea biscuits
  • 125g almonds
  • 75g icing sugar
  • Zest of 1 orange
  • 3 tbsp rum (optional), or orange juice
  • 2 tbsp golden syrup
  • 175g white chocolate
  • 100g desiccated coconut
Method:

Whizz the rich tea biscuits and almonds in a food processor until they are finely ground. Add the icing sugar and orange zest, then pulse until it's all combined. 

In a small bowl, combine the rum ( if using) or orange juice with golden syrup, and while the food processor is still running, pour the liquid into the biscuits mixture. Continue to blend until the mixture is just moist. 

Using a teaspoon to measure, shape the mixture into 25-30 balls. Love to set on a baking sheet. 

Melt the white chocolate in a bowl in the microwave on a low power. Microwave at 30 second intervals to ensure the chocolate does not burn. 

Place the coconut into the separate bowl. First dip the balls in the me,red white chocolate, then in the coconut to cover. Return to the baking sheet and once all the balls are covered, place in the fridge for at least 2 hours to set 


Layered Mango Cheesecake Parfaits


I crave for a dessert and looking for simple but looks delicious. It's a pure laziness. And come out with something easy, none bake but just assemble layer by layer. It's so simple.

Ingredients:

  • 2 ripe mangoes, peeled & stone. If you are too lazy like me I bought a tin of mango puree.
  • 1/2 cup of whipping cream
  • 225g  cream cheese, room temperature 
  • 1/2 cup icing sugar
  • 150g to 200g digestive biscuits, crush into fine crumbs 
Method :

Puree the mango flesh in a food processor until smooth, if using fresh mango. 

Whip the whipping cream to soft peaks. Fold in the icing sugar and room temperature cream cheese and beat slowly until well combined.

Divide the digestive biscuits into the bottom of four serving glasses. Layer mango puree and cream cheese mixture into each glass using piping bags to layer the cheesecake parfaits. If you spoon the ingredients in it may not be as pretty but will taste as good. 

Non-Bake Chocolate Kahlua Cheesecake


Rich, creamy cheesecake flavoured with vanilla, coffee and a very generous kiss of Kahlua, with a classic sour cream topping......

Ingredients:

For the crust
  • 250g digestive biscuits
  • 100g light brown sugar
  • 40g cocoa powder
  • 180g butter, melted
  • 1tsp vanilla extract 
  • 1 tsp instant coffee powder
For the cheesecake filling 
  • 455g cream cheese, at room temperature 
  • 1 cup sour cream, at room temperature 
  • 3/4 cup granulated sugar
  • 1 cup whipping cream, whipped
  • 3/4 cup Kahlua liquor 
  • 2 tbsp powdered gelatin
  • 150g chocolate, melted
For the top layer
  •  1 cup sour cream, at room temperature 
  • 2 tbsp icing sugar
  • 40g chocolate, melted
Optional garnishing
  •  120ml whipping cream, whipped
  • Whole coffee beans
Method:

For the crust

Line the bottom of a 9" springform pan with baking paper. 
Combine the digestive biscuits, brown sugar, coca powder, vanilla extract, instant coffee powder and melted butter in a large mixing bowl. Mix until well combined and press firmly at the bottom and slightly up the side of the prepared pan. Set aside. 

For the cheesecake filling

Sprinkle the powdered gelatin over the Kahlua liquor. Set aside for at least 5 minutes. 
Whip the whipping cream until fairly firm and reserve. Melt the chocolate in a large mixing bowl and set aside. 

In another large mixing bowl, combine the cream cheese, sour cream and sugar and mix on high speed with electric mixer for about 2 minutes, until light and fluffy.

Warm the Kahlua liquor with gelatin in the microwave until completely melted. Pour the warm Kahlua gelatin into the cream cheese mixture and continue mixing until it's well combined. Then slowly fold in the whipped cream until combined. 

Working quickly so the the chocolate doesn't set, pour about half of the cream cheese batter over the melted chocolate and mix with the electric mixer on high speed until well combined. Pour onto the reserved crust and spread evenly all the way to the edge of the pan. 

Top the remaining batter, spread all the way to the edge and then gently tap the side of the pan and give it a little shake help the top settle and smooth out. Place the cake in the fridge for about an hour to set.

For the topping

Melt the chocolate and pour it into a squeeze bottle or a pipping bag.

Combine icing sugar and sour cream then pour over the cheesecake, spread all the way to the edge as evenly as you can, tap the sides and give the pan a little shake like you did before to help make the top really smooth and even. 

Squeeze the melted chocolate on top to decorate the top of the cake. Put the cake back in the refrigerator until completely set, at least 4 hours but preferably overnight. 

When ready to serve, carefully remove the cake from the pan, place it on a cake stand and garnish with swirls of whipped cream and whole coffee beans, if desired. 


Thursday, 15 December 2016

Rocky road cheesecake


Marshmallow heaven. This rocky road cheesecake is simple and delicious. 

Ingredients:

Rocky road base:
  • 200g milk chocolate, melted
  • 50g digestive biscuits, broken into pieces
  • 50g mini marshmallows

Filling:
  • 280g Philadelphia cream cheese
  • 150g marshmallows
  • 180g double cream, lightly whipped
Topping
  • 8 to 10 marshmallows 
Method:

For rocky road base: Mix together all of the base ingredients and pour into a greased and lined 20cm Spring form cake tin, smoothing into an even layer with the back of a spoon. Leave in the fridge to set while you make the filling.

For the cheese filling:  Beat the cream cheese with a wooden spoon to loosen the texture. Heat the marshmallows in a microwave in 10 second burst until they started to melt and go goes, stir briefly and repeat until fully melted. Pour this mixture into the cream cheese mixture and fold until it's just mixed. Fold in the whipped cream and pour the mixture onto the base, smoothing out with a spatula or the back of a spoon till flat. Put in the fridge to set for at least 2 hours. 

Once the cake is set, carefully remove from the tin and place onto a plate. Toast eight to ten marshmallows on skewers over a gas hob or with a blowtorch and place in a circle around the cake.


Orange chicken


This is more popular in America than UK. 

Ingredients:
  • 2 large pieces of chicken breast, cut into bite-sized cubes
  • 2 tsp cooking oil
  • 2 cloves garlic, minced
  • Oil for deep frying 
  • Salt & sugar to taste
  • Chopped spring onions, for garnishing 
  • White toasted sesame seeds, for garnishing
  • Orange sauce 
For frying batter:
  • 1 egg
  • 1/4 cup plain flour
  • 2 tbsp cornstarch
  • 1/2 tsp baking powder
  • 1/4 cup cold ice water 
  • 1/2 tbsp cooking oil
  • Pinch of salt
For orange sauce:
  • 1/4 cup orange juice
  • 1/2 tsp zest of orange zest
  • 3 tbsp water
  • 1 tbsp soy sauce
  • 5 tsp sugar
  • 1 tsp cider vinegar 
  • 2 tsp Chinese rice wine vinegar
  • 1 tsp cornstarch 
Method:

In a bowl, mix in all the orange sauce ingredients. Set aside.

To make the frying batter: In a large bowl, whisk egg and mix in the rest of the frying batter ingredients until batter is smooth. Drop in the chicken cubes, mix well and set aside.

Heat up a wok with deep frying oil. Gently drop in the battered chicken cubes, one by one, making sure it is spread out to prevent sticking. Fry until the colour changes to golden brown and completely cooked. Dish out and drain on paper towels. 

Heat up the wok over medium high heat with 2 tsp of cooking oil. Stir fry garlic until fragrant. Gently  pour in the orange sauce mixture, stir and bring it to a light simmer. Add additional seasoning to taste; ie, water if the sauce is too thick, salt, sugar, etc. 

Toss in the deep fry chicken, stir well until sauces all absorbed and lightly thickened up. Dish out and ready to serve with hot steamed rice. Garnish with chopped spring onions and sesame seed. 

Sunday, 4 December 2016

Eggless Mango Mousse Cake


Decided to make this cake that suitable for vegan therefore I decided to use the eggless chocolate cake. This cake is very simple to put together. 

Ingredients: 

For the eggless chocolate cake:
  • 11/2 cup plain flour
  • 1 cup castor sugar
  • 4 tbsp cocoa powder
  • 1 tsp baking soda
  • 1/2 tsp salt
  • 1 cup water
  • 1/2 cup vegetable oil
  • 2 tbsp lemon juice or white vinegar
  • 1 tsp vanilla extract 
  • 1 tsp coffee (optional)
For the mango mousse:
  • 2 cups mango puree
  • 2 cups whipping cream
  • 2 tbsp sugar, add more or less depending on the sweetness of the mango 
  • 4 tbsp gelatin soaked with 4 tbsp water or 3 tsp agar agar soaked in 3 tbsp water
Method:

For the chocolate cake:

Pre heat the oven to 180°C/160°C for fan oven. Grease and line a 9" pan. 

Combine the flour, cocoa powder, baking soda and salt and sieve twice. Set aside. Add the coffee powder to the water and mix well. Set aside.

Beat the sugar and oil. Add the lemon juice/vinegar and vanilla extract and beat again. 

Sift in the dry ingredients into the wet ingredients and fold gently along with the coffee mix. Once everything is mixed well, pour into the pan and bake for 30-35 minutes. 

Test with skewer or tooth pick in about 30 minutes into the baking, if it comes out clean then the cake is done. Remove and cool in the pan for 10 minutes and then turn into a cooling rack to cool completely. 

For the mango mousse:

Soak gelatin in water, let it bloom for 5 minutes. Then microwave for 30 seconds. Set the gelatin aside to allow the gelatin to cool completely. If using agar agar add it to warm water and heat it up and stir for about a minute or until it becomes clear. 

Once the gelatin is cool, add to the mango puree and mix well. Set aside. 

Remove the base of a springform pan and set the ring on your serving platter or a cake board. Use parchment paper to build the side if the ring will be lower than the cake.

Place the cooled cake inside the ring. Soak cake with the sugar syrup**and set aside.

Whip the cream in high speed until it forms stiff peaks. Now fold in the mango puree and gelatin mixture with the whipped cream. Mix well.

Add the mango mousse over the cake and spread well using a spatula or spoon. Cling wrap and allow to set in the refrigerator for at least  4 hours. 

For the mango glaze:
  • 1/2 cup mango puree
  • 2 tsp gelatin or 11/2 tsp agar agar
  • 3 tbsp water
Once the mousse is set, prepare the glaze.

Soak the gelatin or agar agar in 3 tbsp of water and allow to bloom for 5 minutes. Then heat in a microwave for 30 seconds. Allow to cool completely. If using agar agar, add it to warm water and heat it up for a minute or until it becomes clear. Keep stirring to avoid it form clumping. 

Bounce the gelatin/agar agar has cooled down, mix in the mango puree. Mix well. Pour over the set mousse and spread lightly.

Put the cake back in the refrigerator until the glaze sets completely. Once set remove the springform ring and slowly remove the parchment paper.

Slice and enjoy. 👍

** to make the sugar syrup, add 3 tbsp sugar to 1 cup water, boil it and cool completely.


Saturday, 5 November 2016

Mini Bailey Chocolate Cheesecake


These Mini Bailey Chocolate Cheesecakes are easy to make and the small mini size makes them great for sharing and the perfect size. 

Ingredients:

For the crust:
  • 1 cup Oreo crumbs
  • 30g butter, melted
For the filling:
  • 340g cream cheese, room temperature
  • 1/2 cup sugar
  • 42g cocoa powder
  • 1/2 cup sour cream 
  • 1/2 tsp vanilla extract
  • 1/4 cup Irish Cream liqueur
  • 2 eggs
For the whipped cream and topping:
  • 3/4 cup double cream
  • 6 tbsp icing sugar
  • 2 tbsp Irish Cream liqueur
  • Chocolate sauce
Method:

For the crust:

Preheat oven to 160C/140C for fan oven. Add cupcake liners to a cupcake pan.

Combine the Oreo crumbs and melted butter. Divide the mixture between the cupcake liners and press into the bottoms. 

Bake the crusts for 5 minutes then remove from oven. Allow to cool while you make the filling.

For the cheesecake filling and topping:

Reduce the oven to 150C/130C for fan oven. 

In a large bowl, mix the cream cheese, sugar and cocoa powder until combine. (Use low speed to keep less air from getting into the batter, which can cause cracks.) Scrape down the sides of the bowl. 

Add the sour cream, vanilla extract and Irish Cream. Beat on low speed until well combined. 

Add eggs one at a time, beating slowly and  scraping the sides of the bowl after each addition. Divide the batter between the cupcake liners and fill most of the way. 

Bake the cheesecakes for 12 minutes, then turn off the oven and leave the door closed for another 5 minutes.  Crack the oven door and allow cheesecakes to cool for another 15-20 minutes, then put in the fridge to finish cooling. 

To finish off the cheesecakes, whip the double cream on high until it begins to thicken. Add icing sugar and Irish Cream and continue to whip on high until soft peaks form. 

Pipe the whipped cream on topic the cheesecakes, then drizzle with chocolate sauce. Refrigerate until ready to serve. 


Eggless Strawberry Mousse Cake


If you love strawberries, then this cake is a must have. The soft creamy mousse just melts in the mouth and with an equally delicious chocolate cake to go with the mousse........uff that was truly a match made in heaven. 

Ingredients: 

Egg free dairy free chocolate cake:
  • 1 1/2 cups plain flour
  • 1 cup granulated sugar
  • 4 tbsp cocoa powder
  • 1 tsp baking soda
  • 1/2 tsp salt
  • 1 cup water
  • 1/2 cup vegetable oil
  • 2 tbsp white vinegar or lemon juice 
  • 1 tsp vanilla extract
  • 1tsp coffee (optional)
For the mousse:
  • 1 1/2 cups double cream
  • 1 tsp vanilla extract
  • 1 1/2 cups strawberry puree
  • 2 tbsp granulated sugar ( or to taste)
  • 1 tbsp icing sugar, for the whipped cream
  • 1 tsp lemon juice
  • 3 tsp gelatin  ( if use agar agar powder 2.5 tsp) 
  • Strawberries to decorate, optional 
Method:

For the cake:

Pre-heat oven to 180C/160C for fan oven. Grease and line an 8 inch pan

Combine the flour, cocoa powder, baking soda and salt and sieve twice. Set aside. Add coffee powder (if used) to the water and mix well. Set aside.

Beat the sugar and oil. Add in the vinegar or lemon juice and vanilla extract and beat again. 

Add the dry ingredients into the wet ingredients and fold gently along with the coffee mix. Once everything is mixed well, pour into the pan and bake for 30-35 minutes. Test with tooth pick or skewer, if comes out clean then the cake is done. 

Remove and cool the cake in the pan for 10 minutes and then turn into a cooling rack to cool completely. 

For the mousse:

Leave the bowl with the double cream and beater in fridge. 

Add 3 tsp gelatin with 3 tbsp water and set aside for 5 minutes. Then heat the gelatin in a microwave or saucepan for 30 seconds. Set aside to cool completely. 

Need about 35 strawberries. Roughly chop the berries and put the chopped berries in a blender and puree without adding water. 

Transfer the puree to a saucepan and add 2 tbsp of sugar ( add more if you prefer) and 1 tsp lemon juice. Stir the puree for 3-5 minutes until it's slightly thickened. Remove from heat and let it cool completely. You should have about 1.5 cups of this puree. 

While the puree cools prepare the cream. Make sure the bowl, beaters and the cream is chilled. Add the vanilla extract and 1 tbsp sugar to the cream and whip for about 7-8 minutes until stiff peaks are formed. Do not overbeat. 

As you beat the cream, about 5 minutes into beating, you will start seeing  a beater mark. At this point or when soft peaks form, add the cooled gelatin. Beat again until still peaks are formed. 

Add the cooled strawberry puree and fold gently. Set aside. 

Use a cake ring or a springform pan without the base. Place the ring on a cake board or serving platter. Grease the sides of the pan lightly. 

Gently place the cake inside the pan. Soak the cake with sugar syrup**. Pour the strawberry mousse into the cake ring. Spread it evenly. 

Cover the cake pan and let it set in the fridge for a minimum of 4 hours or overnight. Once the mousse set, remove the ring gently and garnish with some strawberries. 

** to make the sugar syrup add 3 tbsp sugar to 1 cup water, boil it and cool completely 
** if the strawberry is not red in colour you may add some colouring to the puree 


Sunday, 2 October 2016

Oreo Cheesecake Chocolate Cake


Ingredients:
  • 2 cups of sugar
  • 13/4 cup plain flour
  • 3/4 cup cocoa powder
  • 11/2 tsp baking powder
  • 11/2 tsp baking soda
  • 1 tsp salt
  • 2 eggs
  • 1 cup milk
  • 1/2 cup vegetable oil
  • 2 tsp vanilla extract
  • 1 cup boiling water
For non-baked Oreo cheesecake filling:
  • 11/2 cup double cream
  • 226g cream cheese, softened
  • 3/4 cup icing sugar
  • 13 Oreo cookies, coarsely crushed
For milk chocolate ganache :
  • 226g milk chocolate, finely chopped
  • 1 cup double cream
For garnish:
  • 1/2 cup chocolate chips
  • 3/4 cup double cream
Method:

To make the cake:
Preheat the oven to 180C/160C fan assist oven  and grease two 9 inch round baking pans and line the bottom with parchment paper. 

In a large bowl stir together sugar, flour, cocoa powder, baking soda, baking powder and salt.  

Add eggs, milk, oil and vanilla and mix on medium speed for 2 minutes. Add boiling water and mix until it's smooth. Divide the batter into 2 prepared pans and bake 30 to 35 minutes or until skewer inserted in the centre comes out clean. 

Cool 10 minutes in the pans, than remove from pans to wire upside down ( this will flattens domed cakes) and cool it completely.

To make the filling:
In a large mixing bowl whip double cream until firm peaks form.

In another bowl, beat cream cheese and icing sugar until smooth.

Combine cream cheese and whipped cream and stir in the crushed Oreo.

To make the ganache:
In a sauce pan over a low heat melt chopped milk chocolate, remove from the heat and stir in double cream. Stir until it's smooth and pour over the cake. ( If it's too runny cool it a little until ganache is thickened but still thin enough to drip down the sides of the cake.

To assemble the cake:
Spread the filling on bottom layer of the cooled cake, carefully place then second layer on top of the filling, then spoon chocolate ganache on top of the cake. Garnish with chocolate chips and whipped cream if desired. 


Mini Rolo Cheesecakes


These Mini Rolo Cheesecake are super easy to make !! And sure a big hit too, 

Ingredients:

For the crust:
  • 135g Oreo crumb
  • 30g butter, melted
For the cheesecake filling:
  • 340g cram cheese, room temperature
  • 115g light brown sugar
  • 3 tbsp flour
  • 1/2 cup sour cream
  • 1 1/2 tsp vanilla extract
  • 2 eggs
  • 160g chopped rolos
Topping:
  • 130g double cream, cold
  • 3 tbsp icing sugar
  • 1 tbsp unsweetened cocoa powder
  • 1/2 tsp vanilla extract 
  • Caramel sauce
  • Chocolate sauce
  • Rolos
Method:

Crust: Preheat oven to 160.  Add cupcake liners to a cupcake pan.  Combine the Oreo crumbs and melted butter. Divide the mixture between the cupcake liner (about 1 tbsp per cup ) and press into the bottoms.
Bake crust for 5 minutes then remove from oven. Allow to cool while you make the filling. 

Cheesecake filling : Reduce oven to 140C. In a large bowl, mix the cream cheese, brown sugar and flour until combined. (use low speed to keep less air from getting into the batter, which can cause cracks.) Scrape down the sides of the bowl. 
Add sour cream and vanilla extract. Beat on low speed until well combined.
Add eggs one at a time, beating slowly and scraping the sides of the bowl after each addition. Gently fold in the rolos.
Divide the batter between the cupcake liners and fill most of the way.
Bake the cheesecakes for 13 minutes then turn off oven and leave the door closed for another 10 minutes.
Open the oven door and allow cheesecakes to cool for another 15-20 minutes, then put in the fridge to finish cooling.

Topping: Once the cheesecakes are cooled and firm, make the whipping cream. Add the double cream, icing sugar and cocoa powder to a mixer bowl and whip on high speed until stiff peaks form.
Pipe swirls on top of each cheesecake, then drizzle with caramel and chocolate sauce and top with half of a Rolo.

Refrigerate until ready to serve. 


No Bake Mini Raspberry Cheesecakes With Oreo Crust


This non-bake cheesecake is so so beautiful and easy to make. The dark colour of Oreo crust with the cream and pink stripe cheesecake with fresh raspberries and decorated with white chocolate drizzle on top. Best of all no bake!!!!!!! This cheesecake is sure to impress. 

Ingredient:

For the crust
  • 1 cup fine Oreo crumbs
  • 35g butter, melted 
For the cheesecake:
  • 225g cream cheese, softened
  • 1/2 cup icing sugar
  • 1/2 cup double cream
  • 2.5 tsp gelatin powder, dissolved in 1/4 cup cold water and rest for 5 minutes
  • 1 1/2 cup raspberries ( divided)
  • 1 tsp vanilla extract
For the topping:
  • about 1 1/2 cup fresh raspberries 
  • 1/3 cup white chocolate chips
Method:

To make the crust: Combine Oreo crumbs with melted butter, stir until evenly moistened than divide the mixture between 8 paper cups and press into the bottom ( it will be approximately 1 1/2 to 2 tbsp per cup). Set in the fridge to firm while making the filling.

To make the cheesecake:  Place almost 3/4 cup of raspberries in a food processor and pulse until completely crushed. Strain it through a strainer to get rid of the seeds and set aside.

Heat dissolved gelatin until completely melted and set aside to cool.

Beat together softened cream cheese, icing sugar and vanilla extract until light and fluffy, set aside.

Beat double cream until stiff peaks form, add melted cooled gelatin and mix to combine. Add cream cheese mixture and mix to combine.

Take out the crust from the fridge, spoon the cheesecake filling onto the crust and fill the cups half way full. Smooth the top and set in the freezer for 5 minutes. 

Add raspberry puree in the remaining cheesecake filling and mix to combine, then gently fold in remaining 3/4 cup raspberries and spoon the mixture on top of the white cheesecake layer. 

Set in the fridge for a few hours to firm or in the freezer for at least 45 minutes. If you stare them in the freezer keep in mind that the raspberries from the filling will melt and release some juice so don't remove the cheesecakes from the paper cups.

Before serving arrange fresh raspberries on top and drizzle with melted white chocolate.


Saturday, 10 September 2016

Non-Bake White Chocolate Strawberry Mousse Cake


This white chocolate strawberry mousse cake us a delicate and elegant summer dessert, refreshing and most of all really flavourful. It's so so good. 
Though it may seem complicated with so many ingredients and directions, actually is quite easy to prepare. No baking is required which makes it a perfect dessert for summer.  

Ingredients:
For the crust:
  • 250g digestive biscuits
  • 80g butter, melted
For the White Chocolate Mousse
  • 200g white chocolate
  • 50g sugar
  • 5g gelatin powder
  • 2 tbsp cold water
For  Strawberry Mousse
  • 300g strawberries
  • 50g sugar
  • 5g gelatin powder
  • 2 tbsp cold water
  • 200g whipping cream v
Method:

Prepare the strawberry sauce so it has time to cool before preparing the strawberry mousse. Cut the  strawberries in quarters. Place the strawberries and sugar in a small sauce pan no place over medium heat until sugar is dissolved. Remove from heat and puree using a blender. Set aside while you prepare the gelatin. 

Dissolve gelatin in 2 tbsp cold water and let it swell for about 5-10 minutes. Place over low heat just until the gelatin dissolves and then pour it over the strawberry puree. Let the strawberry mixture cool at room temperature while you prepare the rest . 

Prepare the crust. Place the biscuits into a bowl of food processor. Blend until crumbs form. Add melted butter and process until completely combined. 
Press the mixture into the bottom of a non-stick 8 inch springform pan using the back of a spoon. Refrigerated until you prepared the white chocolate mousse. 

Prepare the white chocolate mousse. In a heat proof bowl add the chocolate and 150g whipping cream. Place the bowl over saucepan with simmering water, over low heat until all the chocolate is melted. Meanwhile dissolve gelatin in 2 tbsp cold water and let it swell for about 5-10 minutes. Place the gelatin over low heat just until the gelatin dissolves and pour it over the melted chocolate mixture. Let it cool completely. 
Whip the remaining 200g cold whipping cream until stiff peaks form. Add melted chocolate mixture and mix until well combined. 
Pour the chocolate mousse over the crust and refrigerate for about 15-20 minutes to set. 

Prepare the strawberry mousse.  Whip the cold whipping cream until stiff peaks form. Add the cooled strawberry mixture and mix until well combined. Pour over the set white chocolate mousse. 
Refrigerate for about 4 hours or overnight to set before serving. Run a warm knife around the edges of the cake to remove the sides of the pan. 


Thursday, 1 September 2016

Chocolate raspberry mousse cake


This is a stunning cake. Not just the look but it has a moist, fudgy brownie base, three layer of light mousse- chocolate, raspberry and vanilla and then a glossy topping of chocolate and tangle of raspberries and chocolate curls on top ! 

Ingredients:

For the Brownie Layer:
  • 3/4 cup all-purpose flour
  • 2/3 cup unsweetened cocoa powder
  • 1/2 tsp salt
  • 1/2 tsp baking powder
  • 115g unsalted butter
  • 245g granulated sugar
  • 2 large eggs, at room temperature
  • 2 tsp vanilla extract
 For the Chocolate Mousse:
  • 200g semi-sweet chocolate, finely chopped
  • 13/4 cups heavy cream, divided use
  • Pinch salt
  • 2 tsp unflavoured powdered gelatine
  • 2 tbsp water
 For the Raspberry Mousse:
  • 11/2cups fresh raspberries
  • 250g white chocolate, finely chopped
  • 11/2cups heavy cream, divided use
  • Pinch salt
  • 2 tsp unflavoured powdered gelatine
  • 2 tbsp water
  • Pink food colouring, optional
 For the Vanilla Mousse:
  • 250g white chocolate, finely chopped
  • 11/2cups heavy cream, divided use
  • 4 tbsp honey
  • Pinch salt
  • 2 tsp unflavoured powdered gelatine
  • 2 tbsp water
  • 2 tsp vanilla bean paste (can substitute vanilla extract)
 To Finish:
  • 100g semi-sweet chocolate, finely chopped
  • 130g heavy cream
  • 1 pint fresh raspberries
  • Chocolate curls or other decorations

Method
To Make the Brownie Layer:
Preheat the oven to 180C/160C for fan oven. Line a 9-inch cake pan with parchment. Whisk together the flour, cocoa powder, salt, and baking powder in a small bowl. Set aside for now.
Cube the butter and place it in a medium saucepan over medium-low heat. Stir occasionally as the butter melts. Add the sugar, and stir until it melts. Don’t allow the mixture to come to a boil.
Remove the pan from the heat, and let it cool to lukewarm. Once it has cooled, add the eggs, one at a time, whisking well between each addition. The mixture will start out grainy, but as you add the eggs, it will become shiny and smooth. Whisk the vanilla in. Finally, add the dry ingredients, and stir them in with a spatula. 
Scrape the brownie batter into the prepared pan, and bake it for 22-24 minutes, until a toothpick comes out with just a few moist crumbs attached. Cool the brownie layer completely before proceeding.
To Make the Mousse Layers:
Prepare your pan. You need a 9-inch pan with sides at least 3 inches tall, and the ability to remove the bottom. Line the inner wall with a strip of aluminium foil or waxed paper. Make sure the aluminium or waxed paper is long enough so that it overlaps itself, and if you are using foil/waxed paper, make sure you cut the strip tall enough to extend at least an inch over the pan’s sides, since the cake is about 4 inches tall.
Place a cake cardboard in the bottom of the pan, then carefully place the baked on top of the cardboard. Prepare the chocolate mousse layer: combine the chocolate, 3/4 cup of cream, and salt in a microwave-safe bowl. Microwave in 30-second increments, stirring every 30 seconds, until the chocolate has melted and the mixture is smooth. Pour it into a large bowl, and let it cool to room temperature, stirring occasionally.
While you wait for the chocolate mixture to cool, prepare the gelatine. Whisk together the gelatine and the cold water in a small bowl, and set it aside to let the gelatine absorb the water. When the chocolate is at room temperature, microwave the bowl of gelatine for 15 seconds, until it is melted. Whisk the melted gelatinee and chocolate together.
Whip the remaining 1 cup heavy cream to firm peaks. Fold half of the whipped cream into the chocolate, and once it’s incorporated, gently fold in the remaining whipped cream. Scrape the mousse on top of the brownie, and spread it into an even layer. Refrigerate the cake for 25 minutes, until the mouse has started to set and is firm enough that a second layer can be added.
For the raspberry mousse, make a quick puree by blending 1/2 cup fresh raspberries in a blender or food processor. Pour them through a fine mesh strainer to remove the seeds, and measure out 1/4 cup raspberry puree. (If you have extra puree, save it for another use.)
Combine the white chocolate, raspberry puree, ½ cup of heavy cream, and salt in a microwave-safe bowl. Continue to make this layer the same way you made the chocolate layer, by melting and cooling the chocolate, whisking in melted gelatine, and folding in whipped cream. Add a few drops of pink food colouring to boost the pink colour, if desired. At the very end, stir in the remaining 1 cup of fresh raspberries and pour the mousse over the chocolate mousse layer. Spread it into an even layer, and refrigerate again.
Finally, prepare the vanilla bean layer. Combine the white chocolate, 1/2 cup heavy cream, honey, and salt in a microwave-safe bowl. Continue to make this layer the same way you made the previous two layers. At the very end, stir in the vanilla bean paste and pour the mousse over the raspberry mousse layer. Refrigerate to set the mousse layers very well, at least 4 hours or overnight.
To finish the cake, push the bottom out from the pan, or unhinge the sides, and unwrap the acetate strip. Transfer the cake to your serving platter. Make a quick chocolate ganache by putting the chopped chocolate in a small bowl and heating the cream to a simmer. Pour the hot cream over the chopped chocolate and whisk gently until the chocolate melts and you have a smooth, shiny mixture.
Pour the ganache over the top of the cake, and use a spatula to nudge it right to the edge and over in evenly spaced drizzles. Don’t worry if the top is not smooth—it will be covered up! Add the fresh raspberries and chocolate curls on top of the cake. Refrigerate to set the ganache
For the cleanest slices, cut the cake when it is well chilled. Use a large sharp knife, and wash it frequently between cuts. For the best taste and texture, allow the cake slices to sit at room temperature for 10-15 minutes before serving.

Store Chocolate Raspberry Mousse Cake, well-wrapped, in the refrigerator for up to a week.