Friday, 19 April 2013

Stacie Stewart's Black Beehive Frosted Guiness Cake


Found this recipes while searching for cakes using Guiness. After reading the ingredients and method, decided to have a go with it. This is a rich moist cake. It's unusual method, but trust me, you won't be disappointed. The large amount of sugar is necessary to counterbalance the bitterness of the Guiness, so don't be tempted to cut it down. The classic cream cheese frosting cuts the richness of the cake beautifully.

Ingredients:
  • 250ml/1 cup Guiness
  • 400g caster sugar
  • 100g cocoa powder
  • 250g unsalted butter
  • 2 eggs
  • 100ml buttermilk
  • 1 tsp vanilla essence
  • 250g plain flour
  • 2 tsp bicarbonate soda
  • 1 tsp salt
Cream cheese frosting:
  • 125g unsalted butter, softened
  • 175g full-fat soft cheese
  • 1 tsp vanilla essence
  • 500g icing sugar
  • cocoa pwder, for dusting
Method:

Preheat oven to 180C/160C for fan oven. Grease a 20cm baking tin and line with baking parchment.

Put the Guiness, sugar, cocoa and butter in a pan over a low heat and stir gently until the butter has melted. Leave to cool slightly.

In a large bowl or food mixer, beat the eggs with the buttermilk and vanilla, then add the Guiness mixture, beating until combined.

Sift the flour, bicarbonate soda and salt together. Add in the flour mixture to the Guiness mixture in 3 stages, stirring gently after each addition. Scrape down the sides of the bowl and mix to make sure everything is evenly combined.

Pour the mixture into the prepared tin; it will be really runny. Bake for 60 minutes, until the skewer inserted into the centre comes out clean. Leave to cool in the tin for 10 minutes, then turn out onto a wire rack and leave to cool completely before decorating.

To make the frosting, beat the butter until softened. Add the soft cheese and beat gently, then add the vanilla and icing sugar and beat until thick and creamy. Spead over the top and sides of the cake and dust with cocoa.


Saturday, 13 April 2013

Chocolate Mocha Cake


I found this recipes in goodtoknow recipes. Try out this recipe recently and yes I totally agree this cake is an adult cake which comes with strong, dark coffee and rich dark chocolate. Serve this cake with dark chocolate frosting and plenty of walnuts for crunch. Serve with a warm cuppa as an afternoon treat.

Ingredients:
  • 175g butter, softened
  • 175g castor sugar
  • 3 medium eggs, beaten
  • 200g self raising flour
  • 1 tsp baking powder
  • 2tbsp instant coffee, dissolved in 2 tbsp boiling water, and cooled
  • 60g plain chocolate,finely chopped
For the icing:
  • 125g dark chocolate, broken into pieces and melted
  • 125g butter, softened
  • 250g icing sugar
  • walnut pieces to decorate
Method:

Preheat oven to 180C/ 160C fan. Grease and line a 20cm round cake tin with greaseproof paper.

Put all the ingredients for the cake mixture in a mixing bowl  of an electric mixer and, starting on a low setting, beat together all the ingredients well, Beat for a couple of minutes to make sure all the ingredients are well combined and you have a creamy cake batter. Spoon into the prepared cake tin and bake for 45 to 45 minutes or until the skewer tested in the centre of the cake comes out clean.

Cool in the tin for about 15 minutes before turning out onto a wire cooling rack.

For the filling and topping, carefully melt the chocolate in a bowl over a pan of simmering water. Leave until cool, but still liquid. Beat the butter and icing sugar, then add the melted chocolate. Beat well before slicing the cake in half horizontally and sandwiching together with half of the icing. Use the remaining icing to swirl on the top and scatter with walnuts pieces.


Sunday, 24 March 2013

Citrus olive oil cake


This cake gets its fat content from the healthier option of olive oil. Along with the citrus flavours of lemon and orange, this cake is light and zesty. It only takes 55 minutes to rustle up and is full of flavour. If you fancy jazzing this cake up a bit, top with a light icing and grated orange zest for the prefect finish. If you are on a dairy free diet, substitute the milk for soya milk.

Ingredients:
  • 2 eggs
  • 150g castor sugar
  • 190g self raising flour
  • zest and juice of one orange
  • zest of one lemon
  • 125ml olive oil (not extra virgin)
  • 60ml milk
  • 2 tbsp icing sugar
Method:

Preheat oven to 180C/160C for oven assist. Grease a 20cm cake tin and line with baking parchment.

Whisk together the eggs and sugar until light and fluffy. Add the zest of the orange and lemon, and the oil  and mix until combined. Stir in half of the flour, mix well. Stir in half of the milk and orange juice. Stir in the remainder of the flour. Add in the remainder of the milk and orange juice. Pour into the prepared tin.

Bake for 45 minutes or until a skewer inserted in the centre comes out clean.

Leave to cool in the tin for 5 minutes before transferring to wire rack to cool fully. When fully cooled transfer to a serving plate and dust with icing sugar.


Raspberry & Blueberry Lime Drizzle Cake


I was greedy the other day & bought too much fruits from the farmer market. Who can blame me as the fruits looks so delicious and mouth watering. Decided to google & found this recipes on BBC Goodfood.  This cake is perfect for teatime treat, this moist and fruity cake is easy baking at its best.

Ingredients:

For the cake:
  • 225g butter, softened
  • 225g castor sugar
  • 4 medium eggs
  • 2 limes, grated zest and juice
  • 250g self raising flour sifted with a pinch of salt
  • 25g ground almonds
  • 100g each blueberries and raspberries
For the syrup:
  • 5 tbsp lime juice ( about 2 limes)
  • 1 lime, grated zest
  • 140g golden castor sugar
Method:

Line the base and side of a 20cm/8in square cake tin with greaseproof paper and butter the paper. Set the oven to 180C/160Cfor fan oven.

Cream the butter and sugar together until light and fluffy. Gradually bet in the eggs, adding a little flour towards the end to prevent curdling. Beat in the lime zest, then fold in the flour and almonds. Fold in enough lime juice, about 3 tablespoons to give you a dropping consistency ( the mixture should drop easily from the spoon when tapped)

Fold in three quarters of the blueberries and raspberries and turn into the prepared tin. Smooth the surface, then scatter the remaining fruit on top, it will sink as the cake rises.

Bake for about 1 hour (cover with foil if begining to brown too much), a skewer pushed into the centre should be clean when removed.

Meanwhile make the syrup: put in the lime juice, zest and sugar in a small saucepan. Put over a gentle heat and stir, without allowing to bubble. The sugar should dissolve a little. As soon as the cake comes out of the oven, prick all over with a skewer then spoon the syrup over it.

Carefully remove the cake from the tin, discard the lining paper and cut into 12 pieces to serve.

To store, cool before wrapping in paper and or foil.

Sunday, 3 March 2013

Tiramisu Cake


These coffee infused cupcakes are easier to make than they look. With an extra soft and moist sponge and a creamy coffee-infused topping, these cupcakes only take 15 minutes to bake. Not only the look impressive, they tast delicious too with an extra strong coffee flavour. These cupcakes are elegant and would make a great food gift for friends and family.

Ingredients:
  • 30g plain flour
  • 30g sel raising flour
  • 15g corn flour
  • 15g custard powder
  • 3 eggs
  • 70g castor sugar
For the topping:
  • 200ml double cream
  • 3 tbsp icing sugar
  • 250g mascarpone
  • 60ml espresso coffee or strong coffee
  • 25ml Masala wine
  • 2 tbsp unsweetened cocoa powder
Method:

Preheat the oven to 160C and lone the trays with 12 cupcake cases.

In a large mixing bowl, whisk all the eggs for 1-2 minutes using electric mixer on medium speed, then turn up the speed and whisk for a further 10 minutes. Add the castor sugar gradually, beating until the sugar has dissolved, then beat on high for a further 10 minutes until the mixture is light and fluffy.

Fold the mixture into the flour until just combined.

Fill the cupcakes cases to three quarters full and bake for around 15 minutes. Test they are cooked by inserting a skewer, if it comes out clean, thet are done. Remove from the tray and cool on wire rack for 30 minutes.

For the topping:

Using a skewer or toothpick poke holes almost through to the bottom of the cupcakes.

Mix 30ml of cold espresso and 10ml of Masala and using a teaspoon or syringe or brush, dribble a little of the mix into the hole in the cupcakes.

Place 2 tbsp of cold espresso, 1 tbsp Masala, the mascarpone and double cream and icing sugar into a large bowl and whisk until the mix is stiff enough to pipe. Stop mixing just as its thickening or it will be too thick to pipe.

Pipe or spread the cream on to the top of the cupcakes. If you would like to pipe the topping, just snip the end off a disposable piping bag, there is no need of a nozzle. Start in the centre and pipe up around into a spiral, finishing by pushing down a little and pulling up quickly.

Dust with the unsweetened cocoa powder just before you serve them.


Apricot and Banana Loaf


A lovely cake to eat with a cuppa. This loaf is not too sweet but super moist and packed with fruits and nuts.

Ingredients:
  • 175g butter, softened
  • 100g caster sugar
  • 75g light brown sugar
  • 3 eggs, beaten
  • 175g self raising flour
  • 1 tsp ground cinnamon
  • 1 ripe banana, peeled and mashed
  • 100g ready to eat apricot, chopped
  • 75g pecan nuts, chopped
Method:

Pre heat oven to 170C or 150C for fan oven. Grease a 900g loaf tin and line the bse and the side with baking paper.

Place the butter, caster sugar and brown sugar in a large bowl and beat together until pale and fluffy. Gradually beat in the eggs about 1 tbsp at a time. Sift over the flour and cinnamon and gently fold into the mixture then fold in the apricots, mashed banana and half the pecan nuts.

Spoon the mixture into the prepared tin, gently level the surface and scatter over the remaining of the pecan nuts. Bake for 1 hour to 1 hour 15 minutes until the cake is golden brown and a skewer inserted into the cake comes out clean.

Leave in the tin for 15-20 minutes then carefully turn onto a cooling rack and leave to cool completely.


Bubur Cha Cha


This dessert is generally served during festival seasons in Penang, and a must have on Chap Goh Meh (the 15th and the last day of Chinese New Year) This dessert is basicaly made fom a medley of sweet potatoes, black-eye peas, yam or taro, banana and cooked in a sweet coconut milk base. There is many variaton of this dessert. For me the tapioca jelly, chewy & stretchy in its texture is the best part of it all.

Ingredients:
  • 100g sweet pototoes in each colours, try to get the orange, purple & yellow.
  • 150g yam or taro
  • 20g sago, soaked for 30 minutes
  • 75g black-eye beans, soaked for 1 hour
Tapioca jelly
  • 100g tapioca flour
  • 1/2 cup boiling water
  • red colouring
Coconut milk base
  • 3 liter water
  • 1 cup thick coconut milk
  • 100g sugar
  • 3 bananas, slice about half inches thick
  • 2 pandan leaves
  • salt to taste
Method:

In boiling water, boil black-eye peas until soft.

In another boiling water, boiled sago until translucent and cooked.

Peel and cut all potatoe and yam into cubes or desire shapes. Steam separately until cooked.

To make the tapioca flour jelly, place the flour in mixing bowl. Pour in boiling water. Mix the flour and water until well incorporated. When the dough is cool, roll it out evenly on a well floured surface and cut into cubes or desire shapes.

Bring a pot of water and add in 1 tbsp sugar, pour in the banana and boil for 5 minutes. Drain and set aside.

Boil the 3 liter water then add in the thick coconut milk, sugar, salt and pandan leaves and cook over low heat about 10-20 minutes.

Pour in all the ingredients, together with the sago, tapioca jelly into the coconut milk base and mix well.

Serve hot or cold as you like.


Monday, 18 February 2013

Cappuccino Cake


Found this recipe online and I am a coffee addict, therefore decided that I must make this cake...lol

This coffee cake is light, moist and frothy just like a cappuccino. This sponge is easy to make and is one you will end up baking again and again. It tastes great served warm from the cake rack or after cooling to room temp. Keep it in an airtight container and it will last for at least 3 days.

Ingredients:
  • 300g plain flour
  • 2 tsp baking powder
  • 1/2 tsp salt
  • 110g unsalted butter
  • 250ml milk
  • 2 tbsp instant coffee
  • 4 eggs
  • 375g castor sugar
Method:

Preheat oven to 180C/fan 160C and prepare a 22cm round tin with butter and flour.

Sift together the flour, baking powder and salt and set aside.

In a saucepan, warm the milk until just below boilling and stir in the instant coffee.

Add the butter to the milk and gently warm until melted and then remove from the heat.

In a separate bowl, whick eggs with an electric whisk until frothy.

Gradually add the sugar and continue to whisk until light and fluffy. This step should take about 10 minutes. Then add the dry ingredients to the egg and sugar mixture and fold in until just incorporated.

Add the milk and butter and mix with a spatula until smooth, then pour the mixture into the tin.

Bake for 35-40 minutes or until the skewer inserted into the centre of the cake comes out clean. Remove from the oven and allow to cool for 5 minutes and turn out onto a wire rack and allow to cool fully.


Almond cookies


Decided to bake something different for the year of the snake. This is a traditional chinese new year cookies. This cookies remind me of my childhood days back in Penang. These Almond Cookies are the easiest cookie recipe I've tried. Simply combine all the ingredients in a bowl, make the dough into a small balls, apply some egg wash & bake in the oven. These cookies are exceptionally addicting that I can't stop helping myself with it.

Ingredients:
  • 100g ground almonds
  • 150g plain flour
  • 75g castor sugar
  • 3/4 tsp baking powder
  • 3/4 tsp baking soda
  • pinch of salt
  • 110ml corn oil
  • 1 egg york, beaten
Method:

Sieve the flour, caster sugar, baking powder, baking soda and salt into a bowl. Add in the ground almonds to the flour/sugar mixture.

With the mixer on a medium speed, slowly trickle in the corn oil into the bowl containing the flour/sugars/almonds. Mix until a cohesive dough forms. You may need to add more oil-the aim is to reach a dough which is just able to hold it's shape ( and does not crumble) when you attemptto roll it into a ball.

Heat the oven to 180C/160C for fan assist oven.

Roll the dough into a 2cm balls and place on a baking tray lined with parchment paper. Repeat until all the dough is used up.

Using a pastry brush, lightly glaze the tops of the cookie balls with the beaten egg yolk.

Bake for 15-20 minutes, or until the cookies become slightly golden.

Leave to cool on a wire rack, then tuck in.

Friday, 1 February 2013

Blueberry Yoghurt Cake


This cake is moist and full with fruits, one of your five a day. The yoghurt adds a creamy texture and compliments the sharp bluberries perfectly. If you have not tried baking with yoghurt before, give it a go, it's really easy way to cook.

Ingredients:
  • 1 tsp vanilla extract
  • 500ml plain yoghurt
  • 150g melted butter, allowed to cool
  • 3 eggs, beaten
  • 175g caster sugar
  • 300g plain flour
  • 2 tsp baking powder
  • 1/2 tsp bicarbonate of soda
  • 200g blueberries
Method:

Grease a bundt tin or a deep 24cm round cake tin and line with baking parchment.

Mix the vanilla extract into the yoghurt, then add the cooled melted butter and eggs and mix until combined.

Stir through the sugar, flour, baking powder and bicarbonate of soda and add the wet ingredients to the dry ingredients and mix well.

Stir through the blueberries and pour into the prepared cake tin.

Bake for 30 to 40 minutes or until the skewer inserted into the centre of the comes out clean. Then remove from the oven and allow to cool in the tin for 5 minutes, before transferring to a wire rack and allowing to cool fully.


Saturday, 26 January 2013

Banana Cake With Mocha Frosting And Salted Candied Pecans


Have some over riped bananas and been looking for recipes that is different from the normal banana cakes. Came across this recipes from Bisous A Toi

Ingredients for the cake:
  • 350g plain flour
  • 11/2 tsp ground cinnamon
  • 11/2 tsp baking powder
  • 3/4 tsp baking soda
  • 1/2 tsp salt
  • 230g unsalted, softened
  • 280g sugar
  • 1 tsp vanilla extract
  • 1 tsp instant espresso
  • 2 large eggs
  • 90ml yoghurt
  • 2 cups banana puree
Candied Pecans:
  • 150g pecan nuts
  • 100g sugar
  • 3 tbsp water
  • 1/2 tsp sea salt
  • 1/8 tsp ground cinnamon
Frosting:
  • 280g bittersweet or semi sweet chocolate, coarsely chopped
  • 125ml strong brewed coffee
  • 140g unsalted butter, cut into pieces
Method:

Preheat the oven to 175C or 150C for fan oven. Butter the bottom of two 9" round cake pans and line the bottoms with parchment paper.

To make the cake, in a medium bowl, whisk together the flour, cinnamon, tbaking powder, baking soda and salt.

In a stand mixer, fitted with the paddle attachment, beat together butter and sugar on a medium speed until light and fluffy- about 5 minutes. Add the vanilla and instant expresso powder, then beat in the eggs one at a time, mixing until completely incorporated. Mix in half of the flour mixture, followed by the youghurt and banana puree. Stir in the remaining flour mixture. Don't overmix.

Divide the batter evenly among the 2 prepare pans. Bake until golden brown and the skewer inserted into the centre of the cakes comes out clean, about 40 minutes. Remove from the oven and let cool completely.

To prepare the pecan nuts, in a medium heavy bottomed skillet over medium heat, combine the pecan nuts, sugar and the water. When the sugar begins to liquefy, begin stirring. Continue cooking, stirring frequently, until the sugar crystallizes. Decrease the heat to medium low and continue to cook, stirring, letting the crystallized sugar on the bottom melt and brown slightly. The use a heatproof spatula to scrape up the liquified sugar and continuously coat the pecan nuts with it, tilting the pan to help the sugar coat the nuts evenly.

Once the nuts are a bit glossy and coated with syrup (there will be some sugary crystals on them still, which is normal), sprinkle the sea salt and cinnamon over them. Stir the nuts a couple of times, then scrape the candied nuts onto a baking sheet and let cool completely.

To make the frosting, combine the chocolate and coffee in a medium heatproof bowl set over a pan of simmering water, stirring occasionally until the chocolate is melted and the mixture is smooth. Remove the bowl from the heat and whisk in the butter until combined. Let cool completely, until thick and spreadable.

To assemble the cake, run the knife around the sides of the cakes to help them loosen from the pans. Invert one cake onto a serving plate and peel off the parchment paper. Spread 3/4 cup of the mocha frosting over the surface of the cake. Invert the second cake layer out of the pan, peel off the parchment paper and place it over the frosted cake layer. Spread the remaining frosting evenly over the top and sides of the cake.

Coarsely chop the candies nuts and sprinkle them over the top of the cake.


Tuesday, 25 December 2012

Reindeer Cupcakes


Awwwww ain't they looks lovely. These super cute cupcakes is great for Xmas.

Ingredients:
  • 125g butter, softened
  • 170g castor sugar
  • 2 large eggs
  • 200g self raising flour
  • 2 tbsp cocoa powder
  • 100ml milk
  • 100g dark 70% cocoa solid chocolate, melted
  • 2 tbsp irish cream liqueur (optional)
For the chocolate icing:
  • 50g dark chocolate, chopped
  • 3 tbsp double cream
To decorate:
  • giant chocolate buttons
  • crisp-coated chocolate (such as M&Ms or Smarties)
  • mini pretzels
  • black writing icing
  • mini marshmallows, sliced
Method:

Preheat oven to 170C.  Line 12-hole muffin tray with paper cases.

Beat the butter and sugar together until light and creamy. Gradually beat in the eggs until well combined. Sift in the flour and cocoa powder and mix until combined. Fold in the milk, melted chocolate and Irish cream liqueur, if using.

Sppon the mixture into the muffin cases and bake for 20 minutes or until well risen and lightly firm to the touch. Remove the cakes from the tin and set aside to cool on a cooling rack.

For the icing, heat the chocolate and cream in a saucepan over a low heat until the chocolate has melted. Whisk the mixture until smooth and set aside to cool slightly.

To decorate the cupcakes, spread the icing over the top of the cupcakes. Spoon the remaining icing in an icing bag fitted with a small nozzle.

Press a chocolate button onto the cake as a nose,then stick a crisp-coated chocolate on top using a little icing. Stick on two slices of marshmallows as the eyes, use the black writing icing for the pupils. Stick on the pretzels as the ears.


Mincemeat Cake


This cake is easy to make if you are the buzzzy mummy who doesn't have much time to make the traditional Christmas cakes. Make it a couple of days before Christmas. This cake is so moist and light, it doesn't even need icing!!!!

Ingredients:
  • 175g castor sugar
  • 175g unsalted butter, softened
  • 3 eggs, beaten
  • 300g self raising flour, sifted
  • 2x 411g jars mincemeat
  • handful of chopped glace cherries (optional)
  • 1 tbsp brandy or sherry (optional)
  • 1 tbsp caster sugar, plus extra to decorate
Method:

Preheat oven to 160C/140C for fan oven. Grease and double line the base and sides of a 20cm cake tin with greaseproof paper. Also wrap a double layer of greaseproof paper around the outside of the tin and tie with a string.

Cream together the sugar and butter until light and fluffy. Beat in the beaten eggs. Fold in half of the sifted self raising flour then fold in the mincemeat and cherries, if using.

Fold in the rest of the flour, and add in the brandy or sherry, if using. Spoon the mixture into the cake tin and sprinkle with castor sugar.

Bake for 1 hour, then cover the top of the cake with baking paper and return to the oven for another 1 hour, until cooked and golden. Leave in the tin for 30 minutes, then remove and place on a wire rack. When completely cool, sprinkle with a little extra sugar. 

Christmas Chutney


It's the perfect time to make this chutney as the holiday season is around the corner. Make the chutney 1 month in advance & will be a great give away goodies. A perfect match for cheese and cold meats and also delicious in turkey sandwiches.

Ingredients:
  • 900g tomatoes
  • 3 red peppers
  • 1 large aubergine
  • 1 green pepper
  • 700g onions, peeled and fairy finely chopped
  • 4 cloves garlic, crushed
  • 350g granulated sugar
  • 300ml white wine vinegar
  • 1 tbsp salt
  • 1 tbsp coriander seeds, crushed
  • 1 tbsp paprika
  • 2 tsp cayenne pepper
Method:

Peel the tomatoes-prick them with a sharp knife, place in a bowl and cover with boiling water. Leave for a minute then drain and cover with cold water. The skins will now come away easily.

Chop the tomatoes and aubergine and seed and chop the peppers. Put in a large heavy-based pan with the onions and garlic and bring to the boil. Cover with a lid, lower the heat and gently simmer for about one hour, stirring occasionally, until tender.

Tip the sugar, vinegar, salt, coriander, paprika and cayenne into the pan and bring to boil over medium heat, stirring, until the sugar has dissolved. Continue to boil for 30 minutes or so, until the mixture achieves a chunky chutney consistency and the surplus watery liquid has evaporated. Take care towards the end of the cooking time to continue stirring so that the chutney doesn't catch on the bottom of the pan.

Ladle the chutney into sterillised or dishwasher-clean jars and top with paper jam covers. Seal the jam while still hot. Leave to mature for at least a month in a cool dark place


                          HAPPY CHRISTMAS EVERYONE!!!!!!

Tuesday, 13 November 2012

Banana Blondies


Banana blondies???? Oh my oh my what is this now. Found this recipe on the web under Channel 4 by Simon Rimmer from Sunday Brunch. After reading the ingredients, it's sound interesting and different from the usual banana cake, therefore I decided to have a go with the recipe but with a slight twist. The result.....yummmm

Ingredients:
  • 100g soft brown sugar
  • 100ml double cream
  • 200g unsalted butter
  • 2 large bananas, chopped
  • 1 large banana, mashed
  • 200g white chocolate
  • 1 egg
  • 200g caster sugar
  • 1 tsp vanilla extract
  • 225g plain flour
  • 1/4 tsp baking powder
  • 50g flaked almond, toasted
  • 25g flaked almond, untoasted for sprinkling
Method:

Preheat oven to 190C/170C for fan assist oven.

In a sauce pan boil sugar, cream and 100g butter for 5 minutes to form a thick sauce. Cool slightly and add in the mashed banana & chopped bananas.

Gently melt the remaining 100g butter and the white chocolate in a bowl set over a pan of barely simmering water.

In a large bowl beat the egg with sugar and vanilla extract, then fold in the chocolate mixture.

Sieve in the flour and baking powder, then fold in gently. Add the banana mixture and flaked toasted almonds.

Spoon into  a greased and lined 23cm baking tin, sprinkle with the untoasted almonds and bake for about 35 minutes.

Cool completely and cut into squares before serving.

Tuesday, 6 November 2012

Sesame honey chicken


Been looking around for a nice chicken recipes to cook for my friends. I am looking for something different besides the usual sweet sour chicken. Busy looking around and found this recipe that sounds interesting. Took the first bite, the juicy chicken and the amazing sauce had me hooked from the first bite. If you are craving some amazing chinese food or just in the mood for something different, give this recipe a try.

Ingredients:
  • 2 large boneless skinless chciken breasts
  • 2 tbsp toasted sesame seeds
  • 2 spring onions, sliced
Marinade:
  • 1/4 tsp salt
  • 1/2 tsp sesame oil
  • a dash of ground white pepper
  • 1/4 tsp sugar
Batter:
  • 1/2 cup plain flour
  • 1 tsp baking powder
  • 1 egg, beaten
  • 1/2 cup water ( or as much as needed to make a smooth batter)
  • 3 tbsp corn flour
  • salt to taste
  • 1 tsbp vegetable oil
Sauce:
  • 3 tbsp honey
  • 2 tbsp sugar
  • salt to taste
  • 2 tbsp tomato ketchup
  • 1 tbsp white distilled vinegar
  • a dash of ground pepper
Method:

Cut chicken into 1"chunks and in a bowl combine all the marinade ingredients and mix well. Add the chicken and coat evenly. Cover and marinade for 30 minutes or longer in the refrigerator.

Meanwhile, in a separate bowl, combine all the batter ingredients and mix thoroughly.The batter should be thick enough to coat the chicken but thin enough to flow around the pieces. Set aside.

Using a fork, remove the pieces chicken from the marinade and dip them into the batter to coat evenly (one by one). Deep fry the chicken in batches in your deep fryer for about 10 minutes or until golden brown. Drain on paper towels.

In your wok combine the sauce ingredients and warm over medium heat. Bring to a boil while stirring and simmer until sauce slightly thickens. Add in the fried chicken to the sauce and coat well. garnish with the sliced spring onions and toasted sesame seeds.


Sunday, 28 October 2012

Kerabu Mee Hoon (Rice Noodle Salad)


This is a nyonya style noodle.  This highly appetising noodle dish is spiced up with aromatic herbs and a definate must, tossed with sambal belacan and calamansi juice. I can't get calamansi juice here so I replaced it with lime juice.  One can enjoy this dish anytime of the day, ie for breakfast, lunch or dinner.
This dish is not complicated to prepare but may have difficulty sourcing all the ingredients but that is not a problems you can either omit what you can't find or try substitutuing with another ingredients.

Ingredients:
  • 350g rice vermicelli ( mee hoon)
  • 20 large prawns
  • 10 fresh kaffir lime leaves, finely sliced
  • 3 stalk lemongrass (use the bottom white part only), finely sliced
  • 10 shallots, sliced thinly
  • 2 cloves garlic, minced
  • 2 torch ginger flower (bunga kantan), finely sliced
  • 2/3 cup grated coconut, can be replaced with dessicated coconut if can't get the fresh one
  • 1/4 cup dried shrimp, soaked
  • pinch of salt or to taste
  • 3 tbsp fish sauce
Sambal belacan spice blend:
  • 6 tbsp sambal belacan
  • 1 tbsp palm sugar
  • juice of 8 calamansi lime
Garnishing:
  • handful of mint leaves, finely sliced
  • red chilli, sliced
  • calamansi, halved
  • roasted peanuts, coarsely ground
Merthod:

Prepare kaffir lime leaves, lemongrass, shallots, garlic and torch ginger flower. Combine into a large mixing bowl.

In a pan, toast the grated coconut until browned. Add to the mixing bowl.

Drain the dried shrimp and then grind in a food processor or pound in a pestal & mortar until coarsely ground. Then add into the wok and toasted for 2-3 minutes until fragrant and lightly browned. Transfer into the mixing bowl.

Blanch the rice vermicelli for 2 minutes or till cook. Transfer to a strainer & drain. Then add into the mixing bowl.

In a small bowl prepare the sambal belacan spice blend, mixing well to ensure the sugar dissolves. Set aside.

Add 1 tbsp of cooking oil in a wok and pan fry the prawns until cooked. Add to the mixing bowl.

Toss all the ingredients in the mixing bowl including the sambal belacan spice blend to combine. Add garnishing and disg out to serve. This kerabu mee boon can be serve cold too.

Sunday, 21 October 2012

Coffee Cake


It's the end of National Baking Week today, therefore decided to bake something British. Went shopping the other day and I came across this bottle.


It says Chicory & Coffee Essence. Not knowing what is it, I bought the bottle and decided to google for it. Kerrrr Chinggggg.....found it on Wikipedia

"Camp Coffee is a Scottish food product, which began production in 1876 by Paterson & Sons Ltd. in a plant on Charlotte St, Glasgow. Almost one-hundred years later in 1974 businessman Daniel Jenks merged with Paterson to form Paterson Jenks plc. In 1984, Paterson Jenks plc was bought by McCormick & Company. Thereafter, McCormick UK Ltd assimilated Paterson Jenks plc into Schwartz. Interestingly, McCormick claims not to be the manufacturer on their main site, and the product can't be found on the Schwartz site either.
Camp Coffee is a glutinous brown substance which consists of water, sugar, 4% coffee essence, and 26% chicory essence. This is generally used as a substitute for coffee, by mixing with warm milk in much the same way as cocoa or added to cold milk and ice to make an iced coffee, but it is commonly found on baking aisles in supermarkets as it is also used as an ingredient in coffee cake and other confectionery.
The label is rather old-fashioned in tone, consisting of a drawing of a Gordon Highlander soldier (allegedly Major General Sir Hector Macdonald) and a Sikh soldier sitting down together outside a tent, from which flies a flag carrying the drink's slogan, "Ready Aye Ready". This slogan uses the form of the Scots "aye" meaning yes so the drink was "Ready Always Ready" to be made. Originally the picture depicted the Sikh as carrying a tray of coffee -- an intermediate version, with the Sikh standing but the tray missing was also used (see the fan site link below for this version of the label) -- it is widely believed that this was changed to avoid the imperialist connotations of the Sikh as a servant, although the company does not confirm or deny this. The original drawing was by William Victor Wrigglesworth.
Legend has it that it was originally developed as a method of brewing coffee quickly for military purposes.
Today Camp is a British icon of nostalgia, as many remember it from their childhoods"

Since it mentioned that this Camp Coffe is also used as an ingredient in coffee cake, I decided to google for a recipes that using this Camp Coffee and found a recipe at MyDish.

Ingredients:
For the sponge cake:
  • 250g self raising flour
  • 1 tsp cream of tartar
  • 1 tsp bicarbonate of soda
  • 180g sugar
  • 125g soft margarine
  • 2 medium eggs
  • 1/2 the juice of a lemon
  • 3 tbsp Camp liquid coffee
  • 100ml milk
For the icing:
  • 140g butter, softened
  • 270g icing sugar
  • 1 tbsp Camp coffee
Method:

Pre-heat oven to 180C/160C for fan.

Grease and line 2x20cm baking tins.

In a mixing bowl, mix margarine and sugar until light and fluffy. Add in the lemon juice, Camp coffee and milk and mix well.

Sift the dry ingredients together and blend into the mixture together with the eggs. Mix well throughly into a smooth mixture and pour into the prepared tins.

Bake for 15-20 minutes until springy to touch. The cake should just coming away from the sides of the tin. Leave the sponges in the tins for 10 minutes, then turn out onto a wire rack and leave to cool.

While the sponges are cooling, make the coffee icing. Beat together the icing ingredients until smooth. Put one sponge on a serving plate and spread half of the coffee icing. Top with the other sponge and spread the top with the remaining coffee icing.


Monday, 8 October 2012

Carnation Chocolate Fudge Cake


Found this recipe on goodtoknow website. OMG its so easy to make and yes cuts down on the saturated fat!!!! This chocolate cake recipe is based on an American recipe and uses oil instead of butter. I use ready make caramel from carnation and it makes the filling really easy to make.

Ingredients:
  • 175g self raising flour
  • 21/2 tbsp cocoa powder
  • 1 tsp bicarbonate soda
  • 2 eggs
  • 130g castor sugar
  • 150ml milk
  • 150ml corn oil
  • 2 tsbp vanilla extract
  • 125g dark chocolate (70% cocoa solid)
  • 397g can Carnation caramel
  • 1 tbsp icing sugar

Method:

Preheat oven to 180C/160C for fan oven.

Base line 2x8" sandwich tins with baking parchment

Sift the flour, cocoa powder and bicarbonate soda into a bowl and stir in the sugar.

In a jug, measure the oil and milk, then add the eggs, one tsp vanilla extract and mix together with a fork until combined. Beat 2 tbsp of caramel until smooth and whisk into the egg and oil mixture.

Combine the wet with the dry ingredients and mix well. The cake mix will be quiet wet. Pour the mixture into the tins and bake in the centre of thge oven for 20 minutes until springy to the touch.

Cool the cake in the tins for 5 minutes and then turn out onto a wire rack. Remove the baking paper and cool completely.

Melt the chocolate in a short bursts in the microwave, stirring until smooth. Add the remaining caramel and vanilla to the chocolate and beat well until smooth and glossy. Sift in the icing sugar and combine thoroughly.

Place one half of the cake onto a plate, spread with a generous amount of the frosting and top with the other sandwich half. Spread the remaining frosting over the top of the cake and down the sides to cover completely. Leave to set and cut into slices.
 

Tau Foo Fah


This is my favourite of all time. Too much work to do from scratch. However a dear friends of mine show me a cheating way to enjoy this delicious dessert. I think it should be called quick & easy tau foo fah....lol. Enjoy

Ingredients:
  • 1 litre  of organic soya milk
  • 7 fine leaf gelatine (Dr Oetker)
  • 1 tsp sugar
For the syrup:
  • 1 cup sugar
  • 1 cup water
  • 1 pandan leaf
Method:

Soak the gelatine in cold water until soft.

Warm 1/2 of the soya milk in a microwave (but not until boil).

Add in the sugar and the soft gelatine. Gently stir until the suagr and gelatine dissolve.

Then gently mix into the cold soya milk. Put the mixture through a sieve and place it into a deep dish/bowl. Remember to be gentle so that you do not get the air bubbles on the tau foo fah. Finally when it cold, put it into the fridge for it to set.

For the pandan syrup:

Put pandan leaf in the water and let it bowl for a while. Then put in the sugar and stir until the sugar dissolve. When the sugar is cold, discard the pandan leaf.

Serve the cold tau foo fah with the pandan syrup.

Sunday, 30 September 2012

Koong Chai Pneang (Mooncake Biscuits)


I love to eat this mooncake biscuits with kopi O.

Ingredients:
  • 200g golden syrup
  • 1/4 tsp bicarbonate of soda
  • 1/4 alkaline water ( kan sui)
  • 50g corn oil
  • 300g plain flour, sifted
Egg glazed: mix well
  • 2 egg yolks
  • 1 tsp water
  • pinch of salt
Method:

Combine golden syrup, alkaline water and sifted bicarbonaye of soda in a basin. Add oil and mix with a wooden spoon and allow to rest for 4-5 hours

Fold in sifted flour gradually an mix evenly to form a smooth, soft dough. Do not knead. Let the dough rest for another 6-7 hours.

Divide dough into small portions. Dust with flour and press into figurine mould. Knock out and place on greased baking tray and bake in preheated oven at 180C for 8 minutes. Remove tray from the oven and leave for 1-2 minutes. Brush biscuit with egg glaze and bake again for 6-7 minutes or until golden brown.


Happy Mid-Autumn or Happy Mooncake Festival (中秋节) to all.

Was a last minute decision to make some  traditional mooncake as I decided to invite my Malaysian friends to come over for some food and also to enjoy the mooncake with a nice cup of chinese tea.
 
The ingredients and method of making this mooncake is in the blog http://yummymummyrecipes.blogspot.com/2007/09/tradisional-lotus-mooncake.html

Monday, 24 September 2012

Lemon and Almond Cake


Lemon....lemom......lemon.....
I have few lemons in my fridge and been thinking what should I do with them. Came up with lots of ideas and even thinking about making another Lemon Drizzle but decided to be more adventurous this time and make a different cake. So here it is Lemon and Almond Cake. Intead of using just whipping cream I used mascarpone cheese combine with whipping cream. And the results is lushhhh....

Ingredients:
  • 225g unsalted butter, softened plus extra for greasing
  • 225g caster sugar
  • 4 medium eggs
  • 1/2 tsp almond extract
  • 11/2 lemons, finely zested
  • 75g plain flour
  • 150g ground almonds
  • 11/2 tsp baking powder
For the mascarpone cheese:
  • 200g light mascarpone cheese
  • 100ml whipping cream
  • 3 tbsp icing sugar
  • 5-6 tbsp lemon curd
  • 15g almond flake, toasted
Method:

Preheat the oven to 190C or 170C for fan oven.

Lightly grease 2 x 20cm sandwich tins. Line the bottom of the tins with nonstick baking paper.

In a large bowl, beat the butter and caster sugar until light and creamy. Gradually add in the egg, one at a time and beat until pale and fluffy. If the mixture looks like it is starting to split, add 1 teaspoon of flour.

Beat in almond extract and zest into the egg mixture. Then sift over the dry ingredients and fold in using a spatula. Mix untill well combine. Spoon half of the batter into each tin and smooth the tops to make them level. Bake in the oven for 20-25 minutes, until risen and golden. The cake should just coming away from the sides of the tin. Leave the sponges in the tins for 10 minutes, then turn out onto a wire rack and leave to cool.

While the sponges are cooling, make the mascarpone cream. Beat together the mascarpone, cream and icing sugar in a bowl until smooth. Put one sponge on a serving plate and spread with 3 or 4 tbsps of lemon curd. Top with half of the icing and smooth it out with a palate knife. Top with the other sponge and spread over the rest of the icing.

Add in a little water to the lemon curd to loosen, the drizzle it over the top of the cake and scatter with the toasted almonds.

Monday, 17 September 2012

Raspberry Cheesecake Brownie


Been looking at this recipe for a while now. It's from Hummingbird bakery. Has a layer of choccy brownie topped with cheesecake and covered with fresh raspberry flavoured whipped cream.

Ingredients for the brownie:
  • 200g dark chocolate, roughly chopped
  • 200g unsalted butter
  • 250g icing sugar
  • 3 eggs
  • 110g plain flour
Ingredients for cheesecake:
  • 400g cream cheese
  • 150g icing sugar
  • 1/2 tsp vanilla extract
  • 2 eggs
Ingredients for cream topping:
  • 300ml whipping cream
  • 100g icing sugar
  • 150g rapsberries, plus extra for decorate
  • 33x23x5 baking tray, lined with greaseproof paper
Method:

For the brownie:

Preheat oven to 170C/150C for fan oven.

Put chocolate in a heatproof bowl over a pan of simmering water (do not let the base of the bowl touch the water). leave until melted and smooth.

Put in butter and sugar in a freestanding electric mixer with a paddle attachment and beat until all the ingredients are well incorporated.

Add in the eggs one at a time, mixing well and scraping any unmixed ingredients from the side of the bowl with a rubber spatula after each addition.

Gradually beat in the flour, mixing well each addition, then turn the mixer up to a high speed and beat for a little longer until you get a smooth mixture.

Slowly pour in the melted chocolate and mix thoroughly. Pour into the prepared baking tray and smooth over with a palette knife.

For the cheesecake:

Put in the cream cheese, sugar and vanilla extract in a freestanding electric mixer with a paddle attachment and beat on slow speed until smooth and thick.  Add one egg at a time, while still mixing. Scrape any unmixed ingredients from the side of the bowl with a rubber spatula after each addition. The mixture should be very smooth and creamy.

The mixer can be turned up to a higher speed at the end to make the mix a little lighter and fluffier but be careful not to overmix, otherwise the cheese will split. Spoon on top of the brownie and smooth over a palette knife.

Bake in the preheated oven for 30-40 minuted, or until the cheesecake is firm to the touch and light golden around the edges. The centre should still be pale. Leave it to cool completely, then cover and refrigerate for 2 hours, or overnight if possible.


For the cream topping:

Put the cream, sugar and raspberries in a freestanding electric mixer with a whisk attachment and beat until firm but not stiff.

Turn the brownie out onto a board and turn the right way up.

Spread the topping evenly over the brownie and decorate with more raspberries.

Sunday, 2 September 2012

Banoffee Cake


Time to bake and update my blog again. Been away for more than a month and I do miss baking and cooking. When your are away in places where food is cheap and good, I don't see the point to cook & bake. But today my hands starts to get itchy and decided to bake something quick & easy.

Ingredients:
  • 3 ripe banana, mashed
  • 75g butter, softened
  • 1 can caramel (375g)
  • 225g plain flour
  • 2 tsp baking powder
  • 25g caster sugar
  • 1 large egg
  • 55g dark choc chunks
Methods:

Preheat oven to 180C/160C for fan oven.

Grease and line a 1 kg loaf tin.

 Beat butter and sugar till light and fluffy. Then add in the egg and the caramel. Beat well.

Mix in flour and baking powder together and graduallu fold into the caramel mixture.

Fold in 3/4 of the chocolate chunks and the mashed bananas and then pour into the prepared tin. Sprinkle over the remaining chocolate chunks.

Bake in the preheated oven for 1 hour, covering loosely with foil for the last 15 minutes.

Allow the cake to cool slightly before removing from the tin then slice and serve whilst it is still warm.
 

Wednesday, 11 July 2012

Old Fashioned Lemon Buttermilk Cake

Lemon cake is one of those decadent treats that I try not to bake too often, mostly because I can't stop eating it.
There is a lot of butter in this cake, I really mean a lot. But this is also one of the best lemon cake that I have tasted and it will fill your home with an aroma so alluring you will be tempted to sit next to the oven while it bakes. That's right more lemon flavour. Love it !!


Ingredients:
  • 225g unsalted butter, softened at room temperature
  • 11/2cups of sugar
  • 4 large eggs, at room temperature
  • 3 cups of plain flour
  • 1/2 tsp baking soda
  • 1/2 tsp salt
  • 1 cup buttermilk
  • grated zest of 2 lemons
  • juice of 1 large lemon
For the glaze:
  • 11/2 cup of sugar
  • juice of 1 large lemon
Method:

Preheat oven to 180C. Grease a 10" bundt pan and set aside.

Cream butter and sugar until fluffy and pale. Add the eggs, one at a time, beating well after each addition. and scraping down the sides of the bowl.

Sift the flour, baking soda and salt into a small bowl. Add the flour mixture to the creamed mixture in 3 additions, alternating with the buttermilk in 2 additions, beginning and ending with the dry ingredients. Do not overmix, just fold in gently until the batter looks well combine. Fold in the lemon zest and juice. Don't worry if the batter appear curdled with the addition of the lemon juice.

Pour the batter into the prepared pan, smoothing the top with a spatula. Bake the cake for 1 hour or until the skewer inserted into the centre comes out clean. Transfer the pan to a wire rack and cool for 10 minutes. Meanwhile prepare the glaze.

For the glaze: in a mediun bowl add the lemon juice and the sugar. Mix vigorously to get rid of any lumps of sugar. If the glase isn't thick enough to coat the cake, add more sugar 1 tablesppon at a time, mixing well between additions. The glaze should be thick but pourable.

Invert the cake on a wire rack  set over a baking sheet. Pour the glaze over hot cake and allow to cool completely before cutting.

Monday, 2 July 2012

Banana Cake with chocolate frosting


A nice slice of this banana cake goes well with a nice cup of coffee

Ingredients:
  • 75g butter
  • 160g sugar
  • 2 medium eggs, beaten
  • 200g self raising flour
  • 1/2 tsp salt
  • 1/2 tsp bicarbonate soda
  • 75g chopped walnut
  • 450g overripe bananas
For the icing:
  • 25g butter
  • 2 tsp cocoa powder
  • 175g icing sugar
  • few drops of vanilla extract
  • extra chopped walnut for decoration
Method:

Preheat oven at 180c/160c for fan oven. Grease amd line am 18cm round cake tin.

Reserve half a banana for the icing and place the rest of the bananas in a mixing bowl. Mash until smooth, then set aside.

In a alrge bowl, beat together the butter and sugar until pale and fluffy. Gradually add the eggs and bananas, beat until smooth. Stir in the flour, salt and bicarbonate soda and mix throughly. Quickly mix in the walnuts, then pour into the baking tin.

Bake in the oven for about 45-60 minutes or until the skewer inserted into the middle comes out clean. Turn out the banana cake and leave to cool on a wire rack.

For the icing: place the butter and cocoa powder in a small saucepan. Heat until melted. Mash the reserved banana until very smooth. Add the melted butter mixture to the mash banana and beat well, then add the icing sugar and vanilla extract. Beat throughly until very smooth. use to ice the top of the banana cake once it has cooled. Decorate with chopped walnuts if you wish.

Banana Cupcake with Peanut Butter Frosting


Got a bunch of over-riped bananas from a colleague of mine who wanted to chuck away the bananas into the bin. Told her I am going to be the fairy godmother who will turn thoe bananas into a lovely cakes!!!!! I completely have no idea what I am going to do but I do not want to bake another boring classic banana cake. Decided to google and this lovely recipe & decided to have a go. I wasn't sure you'd actually be able to taste the banana but the banana flavour really shines through. Top it all off  with a creamy peanut butter frosting, and you have an incredible delicious cupcakes!! Overall I was happy with how these turn out-after all who doesn't love banana & peanut butter? Try them soon!

Ingredients:
  • 75g butter
  • 1 cup sugar
  • 2 eggs
  • 1 tsp vanilla extract
  • 1 cup mashed ripe bananas
  • 1/4 cup buttermilk
  • 2 cups plain flour
  • 1 tsp baking powder
  • 3/4 tsp baking soda
  • 1/2 tsp salt
For the peanut butter frosting:
  • 225g cream cheese, softened
  • 1/2 cup creamy peanut butter
  • 1 tsp vanilla extract
  • 3 cups icing sugar
  • 2 tsbp milk
Method:

Preheat oven to 180c/160c for fan oven.

Sift flour,baking powder, baking soda and salt together and set aside.

In a large bowl cream butter and sugar until light and creamy. Add eggs, vanilla extract, bananas and buttermilk. Add the dry ingredients and mix till well combine.

Line the muffin tin with the paper cups. Spoon the batter into the cups about 2/3 full.

Bake for about 15-20 minutes or until the skewer comes out clean. Remove to wire racks to cool completely.

For the frosting: Cream together cream cheese and peanut butter. Add vanilla and then powdered sugar one cup at a time alternating with milk. Beat until it is a spreading consistency.

Spread or pipe on cooked cupcakes and garnish with some melted chocolate.

Bon Appetit!

Thursday, 21 June 2012

Tiramisu Cake


Tiramisu......means pick me up, my absolute favourite Italian dessert. Tiramisu is a cool, refreshing Italian dessert that once tasted, leaves an indelible impression on you. I love the creamy mascarpone and the mellow coffee flavour.
I decided to turn this classic dessert into a delicious cake. I decided to bake two cake sponge cake and soaked them in espresso syrup and covered with creamy mascarpone frosting. The cake is sprinkled with a layer of cocoa powder and covered in a layer of chocolate shavings. I then decorate with ladyfingers around the edge and secure it up with a ribbon.
My guess all "mmmmm"-ed and "aaahhh"-ed as they were eating and I can honestly say that this was one of the most delicious cakes i have ever made. I might be bias as tiramisu is my favourite dessert.

Ingredients:
  • 115g butter, softened
  • 1 cup of sugar
  • 3 large eggs
  • 1 large egg yolk
  • 2 tsp vanilla extract
  • 2 cup cake flour **
  • 2 tsp baking powder
  • 1/8 tsp baking soda
  • 1/4 tsp salt
  • 3/4 cup single cream
Method:

Preheat oven to 180C/165C for fan oven. Lightly grease 2 9" baking pans.

Sieve cake flour, baking powder, baking soda and salt together and set aside.

In a large mixing bowl, cream together butter and sugar until light and fluffy. Add the eggs and egg yolk one at a time, beating well after each addition. Mix in the vanilla extract. Gradually add the dry ingredients. Mix in the cream.

Divide batter evenly between baking pans and bake for 30 minutes or until the skewer inserted in the center comes out clean and the cakes spring back when touched. Allow to cool in the pans for 10 minutes before removing to a cooling rack to cool completely.

Espresso extract:
  • 2 tbsp instant espresso powder
  • 2 tbsp hot water
In a small bowl, whisk together espresso powder and hot water. Set aside.

Espresso syrup:
  • 1/2 cup of water
  • 1/3 cup sugar
  • 1 tbsp Kahlua
In a small saucepan, bring the sugar and water to boil. Remove from heat. Stir in kahlua and 1 tbsp espresso extract. Set aside.

Filling and frosting:
  • 1 cup of cold whipping cream
  • 225g mascarpone cheese
  • 1/2 cup icing sugar
  • 2 tsp vanilla extract
  • 1 tbsp Kahlua
  • 150g semi-sweet chocolate shaving
  • cocoa powder for dusting
  • 20-30 ladyfinger
In a large bowl, whip whipping cream until it form stiff peaks.

In another bowl, whisk together mascarpone cheese, icing sugar, vanilla extract and Kahlua. Whisk in the remaining espresso extract. Fold the whipped cream into the mascarpone  mixture.

To assemble:

If the top of the cake have crowned, use a long serrated knife to trim off the top of the cakes to make them level. Place one cake on a cake plate. Using a pastry brush, soak the top of the cake in 1/3 of the espresso syrup. Spread the top with 1/3 of the mascarpone frosting. Sprinkle with 50g shaved semi-sweet chocolate.

While the second cake layer is resting on the counter, soak the top with another 1/3 of the espresso syrup. Carefully flip the cake upside down and place the cake on top of the other, soaked side down. Soak the top of the cake with the remaining espresso syrup. Spread the remaining mascarpone frosting over the top and sides of the cake.

Dust the top of the cake with cocoa powder until the mascarpone frosting os no longer visible. Press ladyfingers onto the mascarpone frosting on the outsideof the cake, spacing them evenly apart. Secure ladyfingers with a ribbon lightly ties around the cake. Sprinkle remaining chocolate shavings over the top of the cake.

Chill in the refrigerator until ready to serve.

** for cake flour, for every 2 cups of cake flour the recipes calls for, add 13/4 cups of plain flour and 1/4 cup of cornstarch.

Sunday, 10 June 2012

Blueberry and almond tray bake


Went to the vege & fruits stall and saw the blueberry thats so fresh and juicy. Can't resist and bought some. Have no idea what I am going to do with that, decided to google and found this recipes on Woman's Weekly.

Ingredients:

For the base:
  • 100g unsalted butter
  • 200g plain flour
  • 2 level tbsp castor sugar
  • 1 medium egg, lightly beaten
For the filling:
  • 150g unsalted butter, softened
  • 150g castor sugar
  • 150g self raising flour
  • 50g ground almonds
  • a few drop of almond extract
  • 3 medium eggs
  • 150g blueberries
For the topping:
  • 2 tbsp flaked almond
  • icing sugar, for dusting
Method:

To make the base: Prepare a rectangular tin (26 x16.5cm), lined with baking paper.
Add the buttter, caster sugar and flour into a food processor and whisk until the mixture resembles fine breadcrumbs. Mix in the egg until the mixture starts to look like coarse breadcrumbs. Tip the mixture into the base of the tin and press it down firmly to give an even layer.
Chill the base for 10-15 minutes until it's firm.

Set the oven to 180C (160C for fan assist).

To make the filling: Place the butter in a bowl and whisk until soft. Add the castor sugar and cream them together until the mixture is light and fluffy. Add the grounds almomds and almond extract. Gradually whisk in the eggs, one at a time, adding a little flour with each egg. Beat in the rest of the flour. Spoon the mixture over the base, and spread level.

Scatter the blueberries over and press them into the sponge mixture and then top with flaked almonds.

Place the tin in the centre of the oven, and bake for 40-45 minutes or until the mixture is a light-golden brown colour. Remove from the oven and leave it to cool in the tin for 10-15 minutes, and transfer to a wire rack to cool completely.

When the traybake is cold, dust icing sugar over the top and cut into 15 squares to serve.


Monday, 4 June 2012

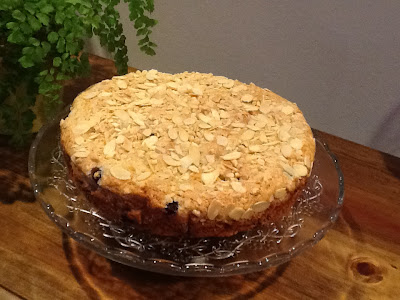
Blueberry White Chocolate Coffee Cake


This is one of the cake that I like to kickstart my day with. It is not too sweet, has nibble of white chocolate, tart berries and crunchy almond topping. You may replace the almond with half cup of chopped hazelnuts.
This cake is so simple that you can prepare it in 10 minutes, bake it for 30 minutes and serve it in 10 minutes later. Deliciouzzzzz

Ingredients:
  • 2 cups of plain flour
  • 1 tsp baking powder
  • 1/2 tsp baking soda
  • 1/4 tsp salt
  • 55g butter, softened
  • 1 cup sugar
  • 1 large egg
  • 1 tsp vanilla extract
  • 1/4 tsp almond extract
  • 1 cup buttermilk
  • 1 cup blueberries, fresh or frozen
  • 1/2 cup chopped white chocolate or white chocolate chips
  • 11/2 tbsp coarse sugar
  • 1/4 cup chopped almond
Method:

Preheat oven to 160C. Line a 9 inch round or square baking tin with aluminum foil and lightly grease.

In a bowl, sift together flour, baking powder, baking soda and salt. Set aside

In a large bowm cream butter and sugar together until light and fluffy. Beat in the egg and vanilla extract and almond extract until smooth. Stir in about half of the flour mixture, followed by the buttermilk and then the rest of the flour mixture. Stir until just combined.

Fold in berries and white chocolate chipsto evenly distribute them. Pour batter into prepared pan and spread into even layer. Sprinkle with coarse sugar and chopped almond.

Bake for 40-45 minutes, or until the skewer inserted into the centre of the cake comes out clean.

Cool completely before slicing.

Mee Siam (Spicy Rice Vermicelli)


Mee Siam which means Siamese noodles is a dish of thin rice noodles (vermicelli) in spicy, sweet and sour light gravy.  There is also a dry version, which is essentially stir-fry the rice noodles with the same spices used in the gravy version.

Originally a Thai dish, it became a Nyonya speciality eventually. Mee Sian uses a few ingredients which brings out the peculiar taste- tau cheong (preserved soya beans), chilli, dried prawns and tamarind juice. The combination of spicy, swet and sour taste makes Mee Siam dish appealing to many.

Ingredients: ( for 2-3 persons)
to be blend together:
  • 5 shallots
  • 2 clove garlic
  • 6-8 dried chilli, pre-soaked for about 30 mins to softened
  • 45g dried prawns, pre-soaked for about 30 mins to softened
  • 2 tbsp tau cheong (preserved soya beans)
  • 20g of tamarind paste, pre-soaked with 1/2 cup water and squeeze for the juice

  • 500g of fresh prawns
  • 400g mee hoon (rice vermicelli), pre-soaked for an hour until softened, drained
  • 1 piece of tau kwa, fried and slice into cubes
  • 8-10 stalks of chives (kuchai), cut into 2" long
  • 200g beans sprout
  • 1 tsp sugar
  • salt to taste
  • 3 tbsp oil


for garnishing
  • 2 eggs, lightly beaten and fry into a thin omelet. Fold and slice the omelet thinly
  • 1 lime, cut into wedges
  • 1 red chilli, thinly sliced
Method:

Using a blender or food processor, grind the blended ingredients into s fine paste and set aside.

Heat up the wok with the oil. Once the oil is heated, fry the blended spice paste until aromatic and oil separates. Add in the salt and sugar.

Add in the prawns, stir fry until half done, then add in the mee hoon (rice vermicelli) an keep stirring until the spice paste has been well blended. Taste and adjust the seasoning by adding more salt or sugar to taste. If the noodles taste bland, add a little fish sauce to taste.

Transfer the noodles onto a big serving bowl and garnish with omelet strips. chilli and lime wedges. Serve immediately.